
Changing a fan belt on a commercial kitchen exhaust fan is the safe removal and replacement of the belt that drives your rooftop or mechanical-room ventilation fan. It prevents downtime, restores airflow, and reduces fire risk for restaurants in All Over Ontario. This guide shows how to change a fan belt step-by-step and when to call a pro.
By Robinhood Cleaners • Last updated: 2026-06-03
Above-Fold: Hook, promise, and table of contents
Use this field-ready guide to change a fan belt on your kitchen exhaust fan without guesswork. You’ll learn prerequisites, safety steps, a clear replacement process, troubleshooting, and pro tips that keep ventilation steady and compliant in busy Ontario kitchens.
During rush, a slipping or broken belt can stall your hood system. Here’s what you’ll find:
- Quick definition and why belt changes matter for airflow and fire safety
- Prerequisites and lockout/tagout safety before any hands-on work
- Exact steps to change a fan belt on a kitchen exhaust fan
- Troubleshooting noises, vibration, and repeat failures
- Best practices, tools, and when to bring in certified help
Overview
A commercial exhaust fan belt transfers motor power to the fan wheel. Replacing it restores designed airflow, reduces smoke and heat, and protects bearings and motors. This overview summarizes the why, when, and how so you can act quickly and safely in a live kitchen environment.
- What it is: a V-belt linking motor and fan sheaves
- Why it fails: wear, misalignment, oil/grease contamination, or poor tension
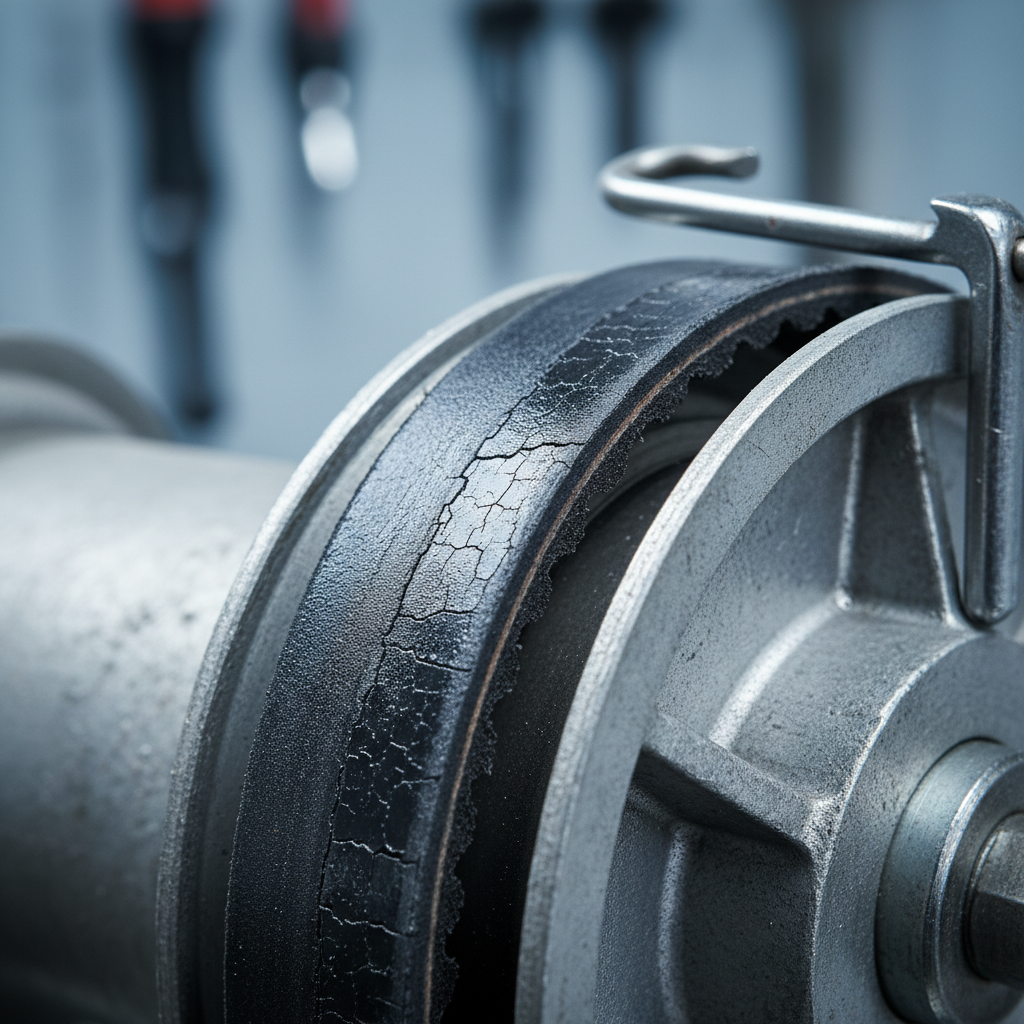
- When to act: squeal, belt dust, weak capture, visible cracks or glazing
- Who should do it: trained staff or a certified ventilation technician
What is a fan belt on a commercial kitchen exhaust?
A kitchen exhaust fan belt is a V-belt or notched belt that transfers power from an electric motor to the exhaust fan pulley. When tensioned and aligned correctly, it keeps hoods drawing grease-laden vapors out of the kitchen to protect air quality and reduce fire hazards.
A “fan belt” on restaurant ventilation usually means a V-belt between a motor sheave and a fan sheave. When it wears or loses tension, airflow drops, filters load faster, and grease mist can linger. In our work across Ontario, belt issues drive a significant share of emergency ventilation calls during service.
- Common belt profiles: A, B, and AX/BX notched V-belts
- Typical signs of wear: cracking, glazing, frayed edges, squeal at startup
- Operational impact: weak capture, hot line, and more smoke alarms
For a deeper dive into overall ventilation care, see our kitchen vent cleaning guide and plan maintenance alongside belt changes.
Why changing the fan belt matters for safety and uptime
Changing a worn belt restores designed airflow, reduces heat and smoke in the line, and helps your system move grease vapors to the hood and ducts. It also protects motors and bearings from overload caused by belt slip and misalignment.
Let a belt degrade and you pay for it elsewhere: extra smoke alarms, stressed staff, and more frequent filter changes. In our experience supporting quick service and fine dining operations, a fresh, correctly tensioned belt stabilizes capture efficiency and keeps line cooks focused on service. Proper belts also cut nuisance shutdowns that disrupt sales and guest experience.
- Better capture and containment at the hood face
- Less motor heat, shaft wear, and bearing noise
- Fewer nuisance smoke events and fewer fan stalls
- Improved kitchen air quality and staff comfort
Pairing belt care with exhaust fan cleaning schedules creates a simple playbook for reliability all year.
How a belt drive works in kitchen ventilation
A belt drive couples a motor sheave to a fan sheave using a V-belt. Friction between belt and grooves transmits torque. Correct tension and alignment prevent slip, minimizing heat and wear while delivering the airflow your hood system was designed to move.
In practice, the motor turns a small sheave that drives a larger sheave on the fan shaft. The V-belt wedges into grooved surfaces, turning torque into fan speed. Too little tension causes slip and squeal; too much tension overloads bearings. Misalignment shears belt edges, creating black dust and premature failure.
- Speed and airflow: Sheave sizes set fan RPM and airflow; keep OEM sizing.
- Friction and heat: Slip converts energy into heat, glazing the belt surface.
- Bearing loads: Over-tension shortens bearing and motor life.
If drive issues persist, combine a belt check with extractor fan cleaning to remove grease that can contaminate belts and sheaves.
Prerequisites and safety before you change a fan belt
Before touching a belt, de-energize the circuit, apply lockout/tagout, verify zero energy, and confirm you can access the fan safely. Gather the exact belt size, tension gauge, straightedge, and PPE. These steps prevent shock, entanglement, and fall hazards.
Changing a fan belt looks simple, but safety comes first. Use proper lockout/tagout, test for stored energy, and verify the disconnect feeds the correct motor. On rooftops, ensure safe access and weather-safe footing. Wear gloves, eye protection, and avoid loose clothing near rotating equipment. Photograph the setup before you move anything.
- Confirm belt code from the old belt (e.g., A44, BX57)
- Photograph sheave orientation before disassembly
- Inspect guards, hinges, and fasteners; replace if damaged
- Check replacement belt profile and length match the original
Local considerations for All Over Ontario
- Plan rooftop access around weather. Winter ice and high winds complicate safe access; schedule non-urgent swaps mid-day when surfaces are drier.
- High-volume seasons (patio rush and holidays) warrant monthly belt checks to avoid peak-time failures and keep capture steady.
- Document work for insurance and WSIB compliance, and coordinate with building management for roof access permissions.
How to change a fan belt (step-by-step)
Release tension, remove the worn belt, clean the sheaves, mount the new belt, align pulleys, set tension with a gauge, rotate by hand, re-guard, and test-run. Verify smooth start-up, correct amperage, and no squeal or vibration.
- Lock out and tag out the fan’s disconnect. Verify zero energy.
- Remove belt guards and note current sheave positions.
- Loosen motor base bolts and slide the motor inward to slacken the belt.
- Slip off the worn belt. Inspect for cracking, glazing, or contamination.
- Clean both sheaves with a degreaser and lint-free cloth. Avoid solvents that attack rubber.
- Install the new belt over the small sheave first, then the large sheave. Never pry with tools.
- Roughly align sheaves using a straightedge across faces.
- Set belt tension using a tension gauge to manufacturer specs.
- Rotate by hand two full turns, then recheck alignment and tension.
- Reinstall guards, remove tools, clear the area, then re-energize for a test run.
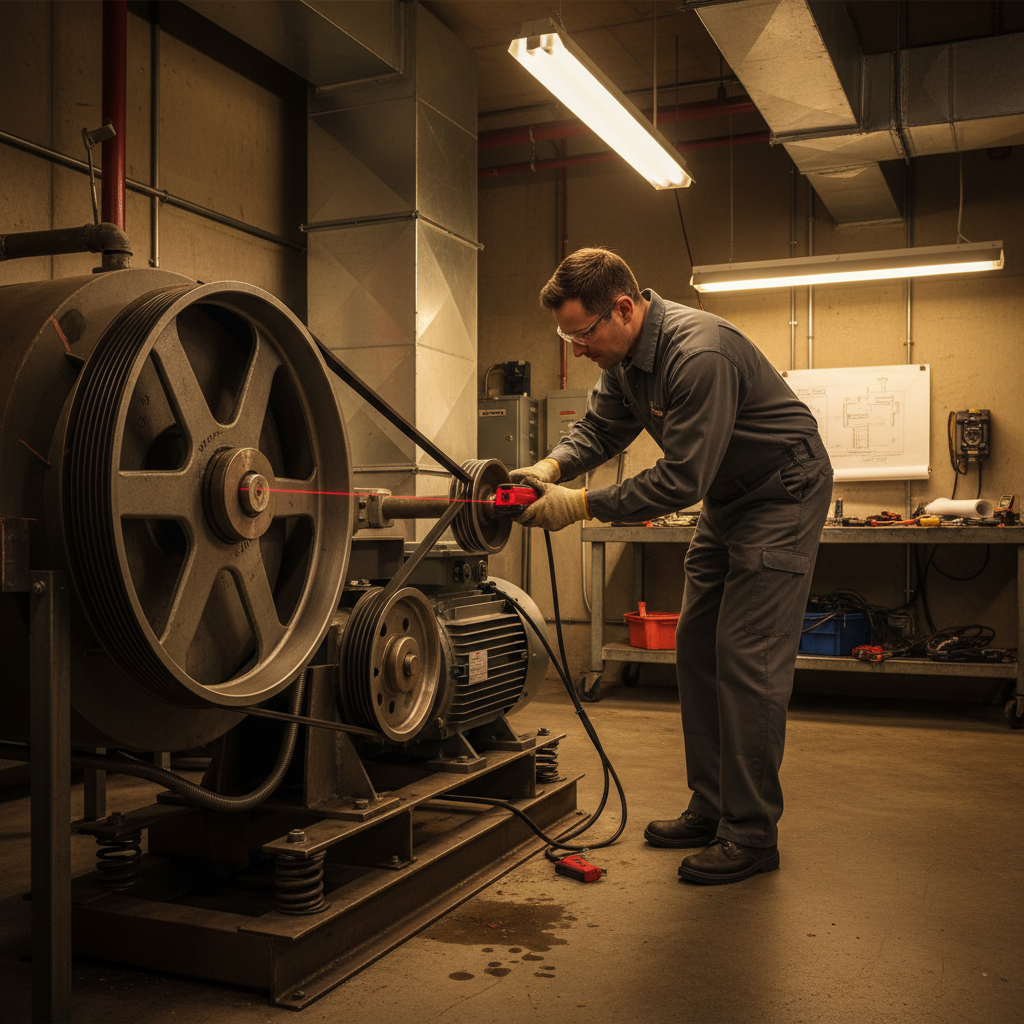
For recurring issues, consider a professional fan belt replacement service that includes laser alignment and a documented inspection.
Troubleshooting after a fan belt change
If you hear squeal, see belt dust, or feel vibration after replacement, recheck alignment, tension, and sheave wear. Confirm motor mounts are tight and that the belt profile matches the pulley. Persistent issues often trace back to a worn or mis-sized sheave.
- Squeal at startup: Tension too low or belt contaminated. Clean sheaves and retension.
- Black dust near guard: Misalignment or sheave wear cutting the belt. Verify with straightedge or laser.
- Rumble/vibration: Loose motor base, bent shaft, or unbalanced wheel; inspect mounts and bearings.
- Repeat failures: Wrong belt size, cupped sheave, or poor maintenance cadence. Replace worn sheave.
To stabilize performance, align belt care with your fan belt maintenance plan and ensure filters are exchanged on schedule.
Belt types, alignment methods, and tension approaches
Most kitchen exhaust fans use classic or notched V-belts. Alignment can be checked with a straightedge or laser. Tension is best verified with a belt tension gauge; “hand feel” is unreliable and shortens belt life.
- Classic V-belts (A/B): Durable, common, and tolerant of greasy environments.
- Notched belts (AX/BX): Run cooler, flex better on small sheaves, and reduce slip.
- Link belts: Handy for odd lengths or emergency use; less common on rooftops.
- Alignment tools: Straightedge, string-line, or laser alignment fixtures for precision.
- Tension tools: Spring gauges or sonic meters provide repeatable results.
| Method | Accuracy | When to use | Risk if skipped |
|---|---|---|---|
| Straightedge alignment | Good | Most belt drives | Edge wear, dust |
| Laser alignment | Excellent | Repeat failures | Persistent belt loss |
| Tension gauge | High | All new belts | Squeal, slip |
| Hand feel | Poor | None recommended | Short belt life |
If airflow still feels weak after a correct install, review your kitchen air quality practices and confirm ducts and hoods are free of heavy grease.
Best practices and preventive schedule
Inspect belts monthly in busy kitchens, clean sheaves at each change, and record tension and amperage. Replace belts proactively every 6–12 months depending on volume, and pair changes with hood and filter service for fewer interruptions.
- Keep spares on-hand labeled by hood/fan ID.
- Document belt codes, alignment checks, and last-change dates.
- Pair changes with filter exchange to minimize downtime.
- Replace cracked or glazed belts immediately; do not re-tension to compensate.
- Recheck tension after 24–48 hours of run-in as the belt seats.
Need a hand? Our certified team can align, tension, and document the entire drive while you run service. Explore our commercial fan belt replacement support for All Over Ontario locations.
Tools, materials, and downloadable checklist
You’ll need the correct replacement belt, wrenches, a straightedge, a belt tension gauge, PPE, and a degreaser. A one-page checklist helps techs avoid missed steps under rush pressure.
- Replacement V-belt (exact code)
- Wrench/socket set and pry-free installation
- Belt tension gauge (spring or sonic)
- Straightedge or laser alignment tool
- Degreaser and lint-free wipes
- Gloves, eye protection, rooftop safety gear
For a broader systems view, this ventilation optimization overview explains how airflow, filtration, and drive condition interact.
Real-world examples from Ontario kitchens
Kitchen fan belts fail for predictable reasons: low tension, misalignment, or contaminated sheaves. These short Ontario scenarios show how simple fixes restore airflow fast while protecting equipment and staff comfort.
- Quick service site: Weekly belt squeal ended after a laser alignment and the correct BX belt size. Capture at the hood face felt steady again during lunch rush.
- Food court stall: Weak capture fixed by a belt change plus a tighter filter exchange cadence that reduced load on the fan.
- Fine dining: Repeat belt dust traced to a cupped sheave; a new sheave ended failures and smoothed vibration.
- Catering hub: Rooftop access delays solved with spares staged and labeled by fan ID for same-shift swaps.
To keep the entire system clean and efficient, pair belt care with routine exhaust fan cleaning and hood service. For belt-specific regional guidance, review our Ontario fan belt replacement guide.
Conclusion and next steps
A precise, safe fan belt change restores designed airflow, reduces heat and smoke, and protects bearings and motors. Combine correct sizing, alignment, and tension with a simple inspection rhythm to keep your hood system reliable all year in Ontario.
- Key Takeaways
- Lockout/tagout and safe access are non-negotiable.
- Clean sheaves, align pulleys, and set tension with a gauge.
- Recheck after run-in; record belt codes and dates.
- Pair belt care with filters, hoods, and duct cleaning for stability.
Action steps: Stage one spare belt per fan, print a one-page checklist, and schedule a monthly 5-minute belt/guard look. If you prefer a certified visit, our team serves operations All Over Ontario with 24/7 scheduling.
Ready for dependable airflow? Book a quick assessment with Robinhood Cleaners and keep service moving. Learn about belt maintenance best practices and practical air quality improvements.
Frequently Asked Questions
How do I know which belt size to buy?
Read the code on the old belt (for example, A44 or BX57) and match the profile and length. If the old code is unreadable, measure the sheave center distance and pulley diameters or contact a service provider for sizing.
How tight should a fan belt be?
Use a belt tension gauge and the manufacturer’s recommended deflection force. “Hand tight” guesses often lead to slip or bearing stress. After a short run-in, recheck tension once the belt seats into the sheave.
Is changing a fan belt different from a car’s serpentine belt?
Yes. This guide covers commercial kitchen exhaust fans with V-belts and adjustable motor bases. Automotive serpentine belts use tensioners and vehicle-specific procedures. Follow equipment manuals for the system you’re servicing.
How often should I replace exhaust fan belts?
High-volume kitchens benefit from proactive replacement every 6–12 months. Inspect monthly for glazing, cracking, or dust. Pairing belt changes with hood and filter service reduces surprise downtime and maintains capture efficiency.