Hear a faint squeal at startup? Notice steam lingering under the hood after a busy lunch? Those subtle signs often point to one critical fix: fan belt replacement commercial hoods. Replacing a worn or slipping belt before it fails protects airflow, reduces grease-laden vapor, and keeps your kitchen compliant and comfortable across Ontario—without disrupting service.
Quick Summary
- Main risk: Slipping or worn belts reduce capture velocity, allowing heat and grease-laden vapors to escape the hood.
- Consequences: Smoke complaints, fire risk, motor strain, failed inspections, and unplanned downtime.
- What to do: Inspect belts whenever the hood is cleaned and at least quarterly; replace proactively when wear, glazing, or tension drift appears.
- Who to call: NFPA 96–aligned, WSIB-insured professionals who work off-hours and document alignment, tension, and airflow checks.
- Local note: For All Over Ontario operators (with quick response in Southern Ontario), Robinhood Cleaners pairs belts with hood cleaning, filters, and fan cleaning to minimize disruption.
Quick Answer
In All Over Ontario at All Over Ontario, the fastest way to stop squeals, restore airflow, and avoid failed inspections is timely fan belt replacement commercial hoods performed alongside hood and filter service. Robinhood Cleaners’ NFPA 96–aligned, WSIB-insured team does this 24/7 with documented tension and alignment checks.
- Shows the exact symptoms that mean “replace” vs. “retension.”
- Outlines the professional process step-by-step (so you know what good looks like).
- Shares Ontario-specific examples and seasonal tips.
- Bundles safety, NFPA 96 context, and maintenance best practices in one place.
What Is Fan Belt Replacement for Commercial Hoods?
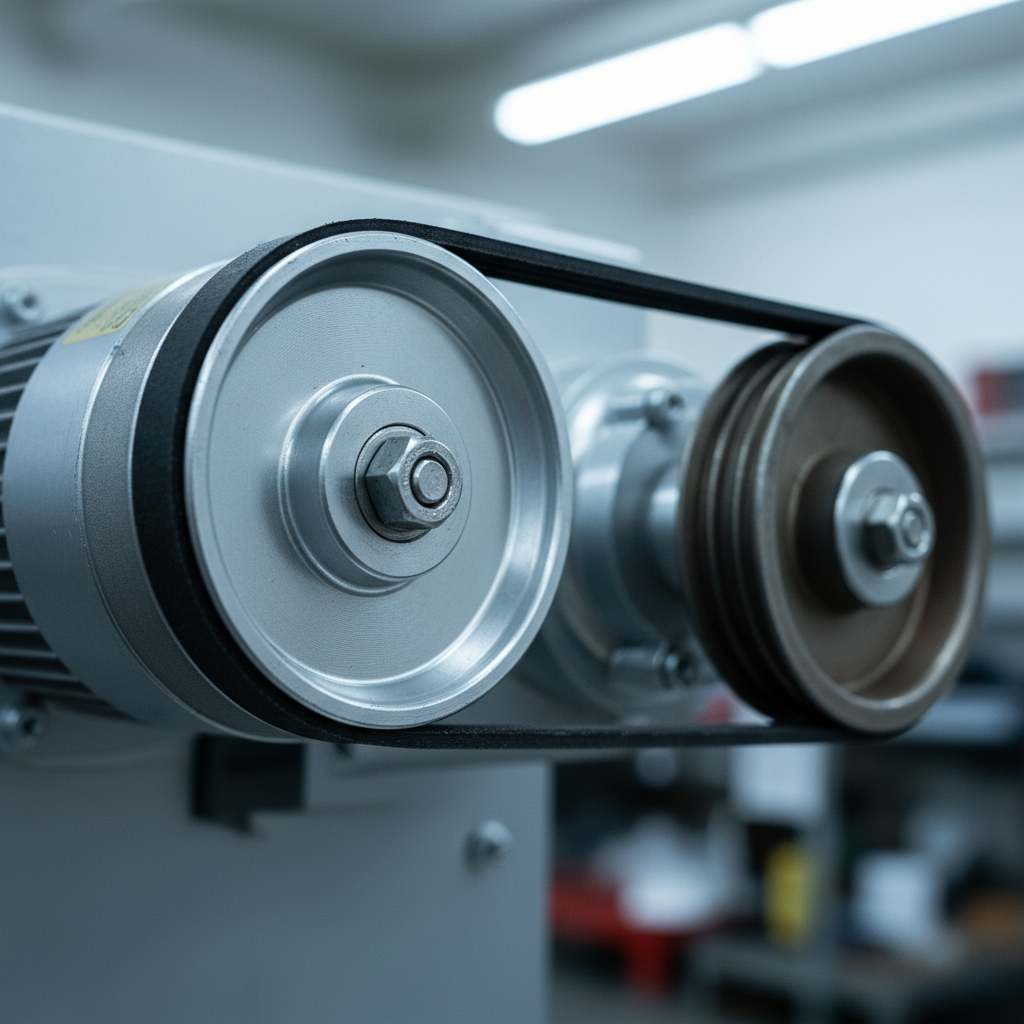
Commercial kitchen exhaust fans are often belt-driven. A V-belt links the motor pulley to the fan (sheave), transferring torque and setting airflow through the hood, ducts, and rooftop fan assembly.
- The job in plain terms: Remove a worn/slipping belt and install a correctly sized, properly tensioned, and well-aligned replacement; then verify quiet start, stable speed, and design airflow.
- Where you’ll find it: On the rooftop exhaust fan assembly (or wall mount), accessed via a hinged cap or service panel.
- Why it matters: Even minor slip cuts capture velocity, raising heat, smoke, and grease accumulation risk.
- What it supports: Reliable hood performance, NFPA 96 compliance intent, staff comfort, and quieter kitchens.
Why Fan Belts Matter (Safety, Compliance, and Operations)
- Safety first: Reduced airflow lets grease-laden vapors deposit inside ducts—exactly what you’re trying to prevent.
- Compliance lens: Inspectors expect effective ventilation aligned with NFPA 96. A slipping belt undermines that expectation.
- Operational impact:
- Hot lines and smoky air, especially during rush periods.
- Motor over-amping and premature bearing wear.
- Noise complaints from squeal or chatter.
- Unplanned downtime at the worst possible time.
- Business outcomes:
- Smoother inspections and fewer emergency calls.
- Predictable performance during services and events.
- Extended equipment life and lower stress on staff.
How Professional Fan Belt Replacement Works (Step-by-Step)
Knowing the process helps you evaluate quality and safety. Here’s how trained, insured technicians handle it.
- Prep and safety
- Verify model, belt size, and fan access; stage OEM-spec belts.
- Lockout/tagout power (test for zero energy).
- Set rooftop fall protection if needed.
- Access and assess
- Open housing; inspect belt wear, pulley faces, guards, hardware.
- Measure belt profile/length if the spec plate is unclear.
- Remove and correct
- Relieve tension; remove belt carefully (no prying on bearings).
- Clean sheaves; confirm set screws, keys, and motor base integrity.
- Align pulleys with straightedge/laser; correct any “soft foot.”
- Install and set tension
- Fit the new belt without forcing.
- Use a belt tension gauge—no guesswork.
- Verify under load
- Hand-rotate; check tracking and clearance.
- Run briefly; listen for rub/squeal; fine-tune tension after run-in.
- Document and schedule
- Record belt size, alignment/tension readings, vibration notes, and next check.
- Bundle with hood and filter service to minimize downtime.
| Step | What’s Done | Why It Matters | Owner |
|---|---|---|---|
| 1 | Lockout/tagout | Prevents injury and liability | Technician/Manager |
| 2 | Inspect & measure | Ensures correct belt spec | Technician |
| 3 | Align pulleys | Reduces wear/noise | Technician |
| 4 | Set tension (gauged) | Restores design airflow | Technician |
| 5 | Run-in check | Catches early slip/rub | Technician |
| 6 | Log results | Builds maintenance history | Manager |
Airflow Basics & Measurement
Airflow tells you whether your belt and fan are doing their job. You don’t need lab gear—just a few practical checks.
- Simple field checks:
- Visual capture: steam and smoke should be pulled fully into the hood, even during rush.
- Sound: startup should be smooth, without chirp or sustained squeal.
- Balance: kitchen shouldn’t feel pressurized (doors hard to close) or under negative pressure (drafts).
- Basic instruments (what pros use):
- Tachometer to verify fan speed before/after belt service.
- Clamp meter to compare motor amps to nameplate.
- Manometer for duct/static pressure checks.
- Anemometer at hood face for spot velocity checks (when safe).
- What changes when belts slip:
- Fan speed drops; capture declines; smoke/steam drifts.
- Motor amps may increase if tension is excessive or alignment is off.
- Belt dust and glaze appear; noise often follows.
- Fan laws (plain English):
- Small speed changes can produce big airflow changes.
- Speed relates to belt grip—poor tension reduces speed and capture.
- That’s why accurate tensioning and alignment matter so much.
Belt Types, Pulleys, and Tensioning
- Classical V-belts (A/B/C profiles): Common, robust, widely available for kitchen exhaust fans.
- Notched (cogged) V-belts: Flex better on small pulleys, run cooler, helpful for tighter radius layouts.
- Banded multi-V: Multiple belts fused together to resist roll-over on higher-vibration assemblies.
- Synchronous (timing) belts: No slip, precise speed ratio; less common on grease exhaust due to debris sensitivity.
- Fixed vs variable-pitch sheaves: Variable-pitch sheaves allow fine-tuning airflow vs. motor amps.
- Tension methods: Motor slide bases, idlers, or automatic tensioners—chosen for accessibility and stability.
Maintenance Approaches (Time, Condition, Predictive)
- Time-based:
- Replace at set intervals (e.g., annually) regardless of condition.
- Simple to manage; may replace earlier than needed.
- Condition-based:
- Inspect belts during hood cleaning and quarterly PM, then decide.
- Balances cost and risk; reacts to real wear patterns.
- Predictive:
- Track vibration, tach speed, and tension readings over time.
- Reveals trends so you can swap belts off-hours before failure.
Best Practices That Extend Belt and Motor Life
- Inspect with a cadence: Tie belt checks to hood cleanings and quarterly PM. Don’t wait for squeal.
- Measure tension and alignment: Use gauges and straightedges/lasers; log the readings.
- Replace multi-belt sets together: Mixed wear drives vibration and short life.
- Keep labeled spares on site: Cuts downtime during unexpected stretch or break.
- Weatherproof the assembly: Confirm rain hats and curb seals; Ontario winters can shock-load belts with ice.
- Post-clean verification: After degreasing sheaves, recheck tension—removing residue can expose slip.
- Train staff on early signs: Startup squeal, smoky lines, or “breathing” hoods signal low tension or misalignment.
- Bundle maintenance windows: Combine belts, filter replacement, and airflow verification after close.
Tools & Resources Professionals Use
- Precision tools: Belt tension gauge, straightedge/laser alignment tool, belt profile gauge, caliper/tape, handheld tachometer, vibration meter.
- Safety gear: Lockout kit, eye protection, cut-resistant gloves, rooftop fall protection.
- Service materials: OEM-spec belts, set screws/keys, anti-seize for fasteners, mild degreaser for sheaves (avoid harsh solvents on belts).
- Documentation: Belt logs with dates, part numbers, tension targets, tach readings, vibration notes.
Common Mistakes to Avoid
- Guessing tension by feel: Under- or over-tension shortens belt and bearing life; always measure.
- Ignoring alignment: Even slight misalignment creates belt dust and heat.
- Reusing contaminated belts: Oil/chemicals degrade rubber; replace if soaked.
- Mixing old and new belts in sets: Uneven loading accelerates wear.
- Skipping guards: Running unguarded is unsafe and non-compliant.
- Delaying after winter storms: Ice shedding can shock-load belts—inspect promptly.
Troubleshooting: Symptoms and Likely Fixes
- Squeal at startup: Low tension or glazed belt—retension and inspect sheaves.
- Weak capture at hood: Check for belt slip, greasy filters, closed dampers, or reversed rotation.
- Hot motor or breaker trips: Over-tension, seized bearings, or incorrect sheave setting—measure amps vs. nameplate.
- Belt dust inside housing: Misalignment or chronic under-tension—look for uneven polish on pulley faces.
- Frequent belt breaks: Wrong profile, sheave damage, or weather shock (icing). Inspect curb and rain deflectors.
When to Replace vs. Adjust (Decision Rules)
- Replace the belt when you see:
- Cracking, chunking, frayed edges, or oil contamination.
- Polished/glazed sidewalls plus slip noise.
- The belt rides too low in the sheave (below manufacturer spec).
- Tension drifts again within weeks after adjustment.
- Water saturation or chemical exposure.
- Adjust (don’t replace) when:
- The belt is new and needs post-stretch retension.
- Alignment was corrected and the belt shows no structural damage.
| Condition | Action | Why |
|---|---|---|
| Glazed sidewalls + squeal | Replace | Surface hardening won’t grip reliably |
| New belt after 24–48 hrs | Adjust | Normal post-stretch retension |
| Cracks/fray visible | Replace | Impending failure under load |
| Misalignment found | Adjust | Correct sheaves, retension, recheck |
Scheduling & Recordkeeping That Pass Inspections
- Cadence that works: Inspect belts whenever hoods are cleaned; perform deeper checks quarterly; replace proactively by wear/hours.
- Maintenance log: Fan ID, date, belt part number, tension reading, alignment note, tach rpm, motor amps, technician, next due date.
- Bundle services off-hours: Pair belts with filters and fire-preventive hood cleaning after close to avoid downtime.
- Align with NFPA 96: Keep documentation that proves effective ventilation and regular service.
Coordinate with Other Kitchen Services
- Filter Cleaning & Exchange: Clean, correctly sized filters reduce static pressure and help belts maintain capture. Schedule alongside belts using our filter replacement plan.
- Hood & Duct Cleaning: Degreased interior surfaces reduce resistance and fire load. See our NFPA 96–aligned hood cleaning.
- Exhaust Fan Cleaning: Clearing blades and housings restores aerodynamic efficiency and quiet operation.
- Grease Trap Service: While not airflow-related, bundling services streamlines compliance and vendor management.
Safety & NFPA 96 Essentials
- Lockout/tagout: Always de-energize and verify zero energy before handling belts.
- Fall protection: Use proper gear near roof edges and in icy conditions (common in Ontario winters).
- Machine guarding: Replace guards; never run with exposed rotating components.
- WSIB-insured work: Protects Ontario operators from workplace liability.
- Compliance intent: Maintain ventilation that removes grease-laden vapors reliably in line with NFPA 96 expectations.
- Documentation for inspectors: Photos, belt specs, alignment/tension readings, and service intervals help demonstrate due diligence.

Pair your next belt change with a full hood and filter service to restore capture velocity in one visit. Our team works nights and off-hours across Ontario to keep your line moving.
Explore our commercial hood cleaning service and plan a bundled visit that fits your schedule.
Pricing Factors (No Numbers—What Drives Investment)
- Access & complexity: Roof height, safe ladder or stair access, and weather conditions.
- Equipment specifics: Belt type/size, single vs. multi-belt, sheave condition.
- Timing: After-hours, overnight, or emergency response windows.
- Bundled work: Combining belt replacement with hood cleaning, filter exchange, and fan cleaning to reduce repeat visits.
- Documentation depth: Detailed logs, photos, alignment/tension readings, and NFPA 96 alignment for inspectors and insurers.
Case Snapshots from Southern Ontario Kitchens
1) Multi-unit quick-service chain (GTA)
- Issue: Intermittent smoke alarms and a hot cook line during rush periods.
- Action: Corrected pulley alignment, installed new banded belts, verified tach speed and motor amps, staged labeled spares on site.
- Result: Restored capture velocity, quieter starts, and zero alarm trips in the next quarter.
2) Hotel banquet kitchen (Niagara corridor)
- Issue: Vibration and belt dust after winter storms.
- Action: Replaced a damaged sheave, installed new belts, upgraded curb seal to limit water ingress, set a seasonal recheck.
- Result: Vibration readings cut roughly in half; stable airflow through event season.
3) Institutional cafeteria (Hamilton–London corridor)
- Issue: Frequent retensioning requests and uneven wear.
- Action: Corrected soft foot on motor base, switched to notched V-belts, documented new tension baseline.
- Result: Six-month run time without adjustment and smoother inspections.
4) Downtown bistro (Toronto core)
- Issue: Guests noticed kitchen odors during peak service.
- Action: Belt replacement + filter exchange; verified fan rotation and damper position.
- Result: Odors resolved; staff reported cooler line temps.
5) University dining hall (Kitchener–Waterloo)
- Issue: Belt dust accumulation and recurring squeal after midterms rush.
- Action: Alignment correction with laser tool; installed banded belts; set monthly checks.
- Result: No squeal; extended belt life through exam season.
6) Lakeside resort kitchen (Muskoka access)
- Issue: Seasonal open/close caused tension drift and startup noise.
- Action: Pre-season belt swap; off-season cover and curb seal refresh.
- Result: Quiet startups and better capture all summer.
7) Quick-service burger shop (Windsor)
- Issue: Breaker trips at lunch hour.
- Action: Reduced over-tension, corrected sheave wear; replaced belt set.
- Result: Stable motor amps; no trips for months.
8) Food hall vendor group (Mississauga)
- Issue: Mixed belt sizes across similar fans complicated spares.
- Action: Standardized belt specs and labeled storage.
- Result: Faster response and fewer purchasing errors.
9) Community center kitchen (Burlington)
- Issue: Belt slip after heavy rain.
- Action: Upgraded rain hats and resealed curb; new belts installed.
- Result: No further water ingress; consistent capture.
10) Airport lounge kitchen (Pearson area)
- Issue: Tight overnight windows required minimal downtime.
- Action: Bundled belts with filter exchange and hood cleaning in a single visit.
- Result: One-and-done service window; on-time morning opening.
11) Hospital cafeteria (Guelph–Cambridge)
- Issue: Noise complaints from adjacent wards.
- Action: Alignment correction, sheave cleaning, belt swap; verified vibration.
- Result: Noticeably quieter operation; no further complaints.
12) Family diner (Peterborough)
- Issue: Belt failures every few weeks.
- Action: Identified wrong belt profile in use; replaced sheaves and belts to spec.
- Result: Normalized runtime with quarterly checks only.
KPIs to Monitor Monthly
- Startup noise count: Track squeals or chirps per week.
- Motor amps vs. nameplate: Rising amps suggest misalignment or over-tension.
- Tach speed variance: Compare to baseline after new belt install.
- Filter pressure drop: Clogged filters force belts to work harder.
- Incident log: Note smoke complaints or odor mentions.
How to Choose a Service Partner (Checklist)
- Certification & insurance: NFPA 96–aligned, WSIB-insured for Ontario.
- 24/7 availability: Can they work after close or pre-open?
- Documentation quality: Do they log belt specs, tension, alignment, and photos?
- Comprehensive services: Can they bundle belts with filters, hoods, ducts, and fan cleaning?
- Local responsiveness: Quick service in Southern Ontario reduces downtime risk.
- References: Proven track record with multi-location restaurants.
DIY vs. Pro Service: What’s Right for Your Team?
- DIY makes sense when:
- Your maintenance staff are trained on LOTO and rooftop safety.
- The fan is accessible and specs/history are clear.
- You have a tension gauge, alignment tool, and proper PPE.
- Call certified pros when:
- Access is risky, specs are unclear, or symptoms persist after adjustments.
- You need NFPA 96–aligned documentation and WSIB-insured work.
- Coordinating belts with filter exchange and hood cleaning would reduce downtime.
- Middle ground: Keep spares on site and train closing staff to recognize early signs; schedule pros for alignment, tensioning, and verification.
Checklist: 10-Minute Belt Health Check (Use Monthly)
- Listen for squeal on startup or ramp-up.
- Feel (with gloves, power off) for vibration at the fan curb.
- Look for belt cracks, fray, or black dust.
- Check that the belt rides near the top of the sheave, not low.
- Confirm guards are present and secure.
- Inspect motor base bolts and slots for movement.
- Verify the belt hasn’t been contaminated by oil or degreaser.
- Scan for water ingress or rust trails inside the housing.
- Note ambient temperature swings since the last check.
- Log findings and plan the next action.
Templates: Belt Log & PM Planner
Belt Log (fields to track)
- Fan ID and location (rooftop/wall, access route)
- Belt profile and part number (A/B/C, length)
- Install date and technician
- Tension reading (initial and post-run-in)
- Alignment status (straightedge/laser pass)
- Tach rpm and motor amps
- Notes (noise/vibration/odors)
- Next inspection/replacement date
PM Planner (suggested cadence)
- Every hood cleaning: visual belt check, guard check, quick alignment glance
- Quarterly: tension measurement, laser alignment check, sheave cleaning
- Seasonal (post-thaw): rooftop housing and curb seal inspection
- Annually: proactive replacement based on wear/hours and trend data
Local Tips
- Tip 1: Wind off Lake Ontario can push fumes back into rooftop units. After a stormy day, have staff do a quick listen-and-look on the fan curb for vibration and belt dust.
- Tip 2: In winter, ice shedding can shock-load belts. Schedule a post-thaw check—pair it with your regular hood cleaning to save a trip.
- Tip 3: For Southern Ontario’s late-night rushes, book belt work after close; our teams operate 24/7 to keep lines moving without downtime.
IMPORTANT: These tips are most effective when combined with documented inspections from WSIB-insured, NFPA 96–aligned technicians.
FAQ
How do I know my commercial hood needs a new fan belt?
Listen for squeal on startup or under load, check for weak capture at the hood (steam hangs or smoke lingers), and look for belt dust inside the fan housing. If tension drifts again within weeks of adjustment, or you see cracks, fray, or glazing on belt sidewalls, it’s time to replace.
What’s the right inspection frequency for belts on restaurant exhaust fans?
Check belts whenever your hood is cleaned and at least quarterly. Ontario weather can add stress, so increase checks after major storms or freeze-thaw cycles. Proactive replacement based on wear, hours, and vibration readings prevents surprise downtime during service.
Can my in-house team replace the belt safely?
Yes—if they’re trained on lockout/tagout, rooftop fall protection, and have the right tools (tension gauge, alignment tool). Many restaurants keep a spare labeled belt on site. If access is risky, specs are unclear, or issues persist, bring in a certified, WSIB-insured team.
Will a slipping belt affect our health inspection?
It can. Reduced capture velocity means more grease-laden vapor can escape the hood, contributing to buildup and smoke complaints. Inspectors expect effective ventilation aligned with NFPA 96. Documented service, alignment, and tension readings help demonstrate compliance intent.
How do I reduce future belt issues?
Measure tension and alignment (don’t guess), replace multi-belt sets together, weatherproof the rooftop assembly, and keep spares on site. Bundle belt work with filter exchange and hood cleaning after close to save time and protect airflow.
Key Takeaways
- Don’t wait for loud symptoms—inspect on the same cadence as hood cleaning.
- Use gauges for tension and alignment; guessing shortens component life.
- Replace proactively to preserve airflow, pass inspections, and avoid rush-hour failures.
- Bundle belts, filters, and hood cleaning after close to minimize disruption.
Next Steps
- Schedule a bundled belt + hood + filter service window that fits your hours.
- Stage a labeled spare belt on site and start a simple belt log.
- Share your latest inspection report—we’ll align work with NFPA 96 expectations.