Strange noise from your rooftop fan? Smell of hot rubber during the dinner rush? Here’s the reality: when a hood fan belt slips or snaps, airflow drops, grease-laden vapors linger, and risk climbs fast. This complete guide explains fan belt replacement commercial hoods in clear, practical steps so you can keep ventilation strong, protect staff, and stay inspection-ready across Ontario.
At a Glance
- Understand what a commercial hood fan belt does and why it fails.
- Spot early warning signs before downtime hits your line.
- Follow a step-by-step service flow used by certified technicians.
- Apply best practices aligned with NFPA 96 and health inspections.
- Use maintenance schedule templates and record-keeping tips.
- Know when to call 24/7 help for urgent service in Southern Ontario.
Quick Answer
Operating All Over Ontario at All Over Ontario? Timely fan belt replacement for commercial hoods keeps airflow steady and hazards low. Robinhood Cleaners is NFPA 96 certified and WSIB insured, providing 24/7 fan belt replacement commercial hoods plus full exhaust cleaning—so your kitchen stays safe, compliant, and open.
What Is a Hood Fan Belt?
In most commercial hood systems, the rooftop exhaust fan uses a V-belt or multi-rib belt to connect the motor to the fan pulley. That belt transfers power so grease-laden air gets pulled through hoods, filters, and ducts to the outdoors.
- Core job: Maintain consistent airflow (CFM) to capture heat, smoke, and grease vapors.
- Where it sits: On the roof inside the fan housing, spanning the motor and fan pulleys.
- What it endures: Heat swings, moisture, grease, vibration, and constant start/stop cycles.
- Common failures: Glazing, cracking, fraying, stretching, misalignment wear, or outright breakage.
- Upstream impact: Poor capture at the hood face, smoky line, excessive heat on the cooks’ line, and more grease settling in ducts.
For capture and containment at the hood, airflow must be steady. A slipping belt quietly undermines that performance long before it breaks.
Why Fan Belts Matter for Safety and Compliance
- Fire hazard reduction: Strong airflow removes grease vapors before they condense. Weak belts = more residue on filters, hoods, and ducts.
- NFPA 96 alignment: Reliable ventilation supports the code’s intent—limiting grease accumulation and maintaining safe operations.
- Health inspections: Poor capture means smoke and particulates linger in the cookline area, raising red flags for inspectors.
- Employee comfort: Adequate exhaust improves heat and air quality for cooks, dishwashers, and runners.
- Business continuity: Belt snap during peak service can stall the line. Proactive replacement prevents avoidable downtime.
Here’s the thing: most belt issues are predictable. With simple checks and a realistic schedule, you can avoid surprise failures and reduce grease build-up at the source.
Fan Belt Replacement for Commercial Hoods: Step-by-Step
Certified technicians follow a structured, safe, and fast process designed around rooftop realities and busy service windows.
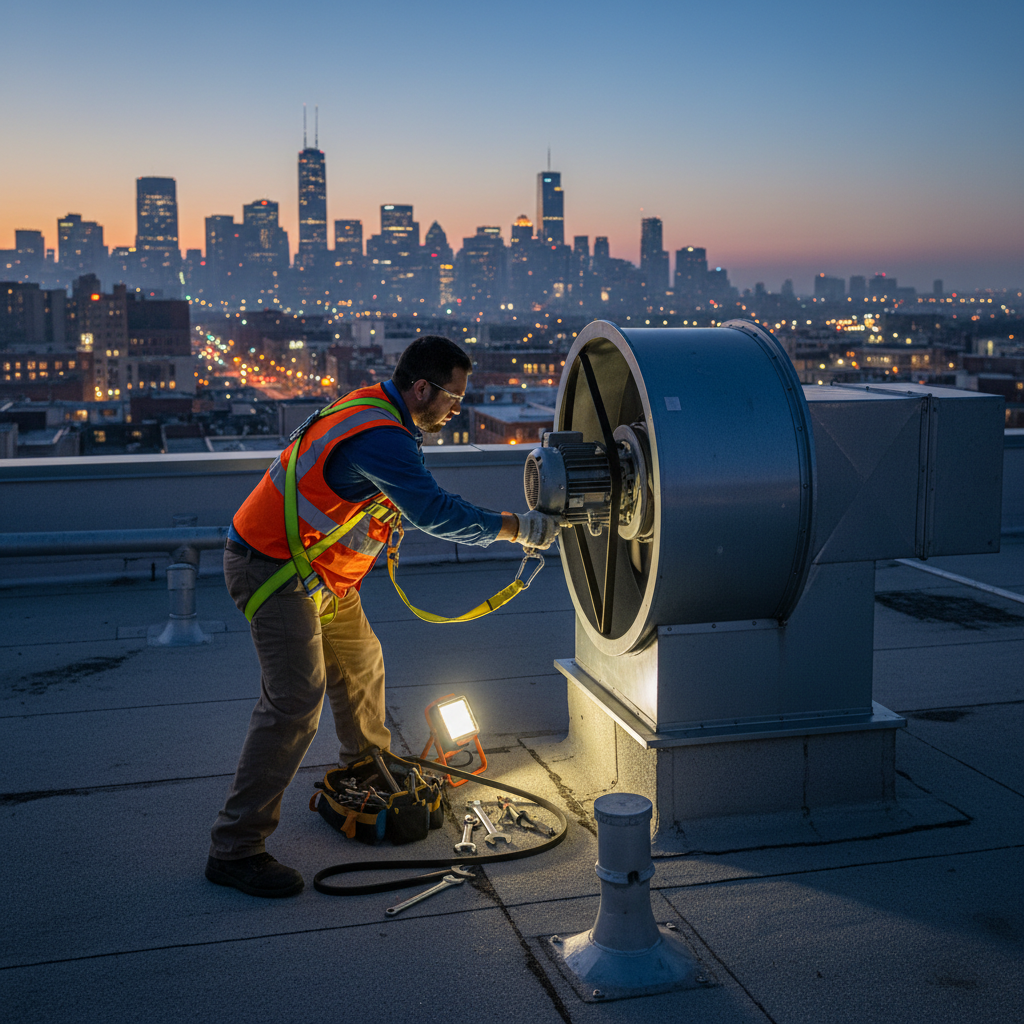
- Lockout/tagout & access: Power is verified off. Safe roof access, harnessing, and weather check are completed.
- Protect & prep: Drip pans, absorbents, and clean mats protect the roof and fan base from grease and debris.
- Cover removal: Technician opens the fan housing and inspects guards and hinges.
- Assessment: Check pulleys for wobble and scoring. Inspect bearings, motor mounts, and belt wear pattern.
- Right-size selection: Confirm belt type (A, B, 3L, 4L, etc.), length, and profile to match sheaves and OEM specs.
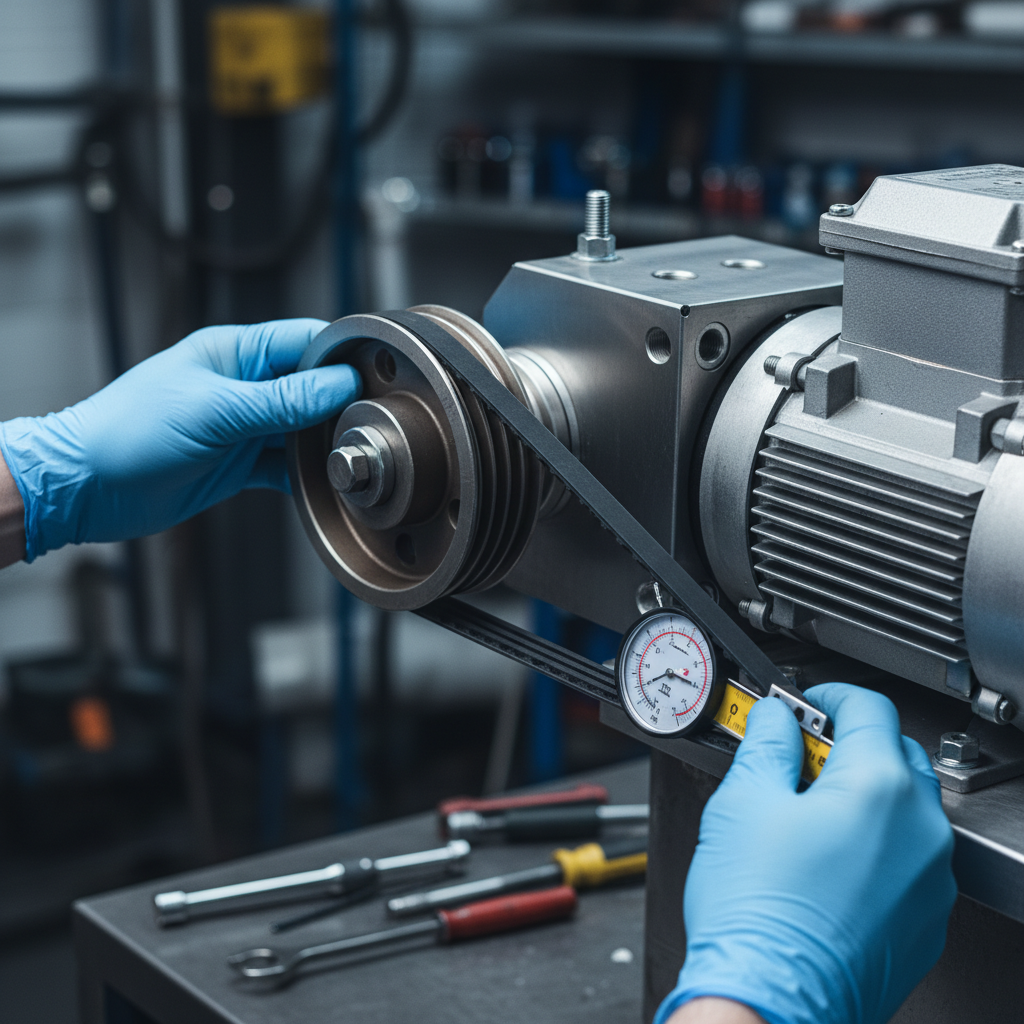
- Alignment & tension: Align motor and fan pulleys with a straightedge or laser. Set new belt tension using a gauge; re-check after a short run-in.
- Spin test: Hand-rotate to confirm no rubbing. Power-on trial confirms vibration levels and amperage draw.
- Final QA: Secure guards, clean surfaces, and document readings (belt spec, tension, amp draw, date, tech initials).
Pro tips from the field
- Replace in pairs (where applicable): Twin belts should be matched—don’t mix old and new.
- Re-tension after 24–48 hours: New belts seat into the sheave and can loosen slightly.
- Log it: Keep a simple rooftop log card with belt size, install date, and tension notes.
- Listen: Squeal at startup often points to low tension or glazing.
For an overview of how cleaning cadence complements mechanical service, see our discussion of hood cleaning frequency and how it impacts capture and containment in real kitchens.
Belt Types, Sizing, and Maintenance Approaches
Not all belts—or maintenance plans—are created equal. Choose based on load, environment, and uptime needs.
Common belt profiles
- Classical V-belts (A/B/AX/BX): Durable, widely available; cogged versions run cooler and flex better.
- Fractional horsepower (3L/4L/5L): Lighter-duty fans; verify sizing to avoid slip under grease load.
- Multi-rib/serpentine: Smooth, high contact area; sensitive to misalignment.
- Matched sets: For multi-groove pulleys, improves equal load sharing and lifespan.
Approaches to maintenance
- Run-to-failure (not advised): Accepts downtime risk and emergency calls.
- Preventive (recommended): Replace on a schedule based on hours and environment.
- Condition-based: Replace when readings (tension, vibration, amp draw) drift from baseline.
- Bundled with cleaning: Combine fan belt checks with scheduled exhaust cleanings for efficiency.
Right-size your schedule
- Heavy grease load (fried chicken, wok, charbroil): Inspect monthly; plan quarterly replacement or as data indicates.
- Moderate load (mixed grill, pizza, sauté): Inspect bi-monthly; plan semiannual replacement.
- Lighter load (bakeries, low-grease): Inspect quarterly; replace annually or on condition.
For filters, pairing a proper belt schedule with a smart exhaust filter replacement guide keeps overall system resistance stable and capture consistent.
Best Practices for Restaurants and Institutions
- Document everything: Belt size, install date, tension, and tech initials—stored with hood and duct cleaning records.
- Standardize parts: Keep labeled spares for each rooftop unit to speed emergencies.
- Measure tension: Use a gauge; “by feel” creates inconsistent results and early wear.
- Track amps and vibration: Rising amp draw or vibration suggests misalignment or bearing issues.
- Protect from grease: After cleaning, ensure fan bowls and housings are wiped; standing grease shortens belt life.
- Align with code cycles: Tie inspections to your NFPA 96 cleaning cadence for simplicity and compliance.
- Weather-aware scheduling: In Ontario winter, plan rooftop work outside ice/snow events when possible.
- Use matched sets: On multi-groove pulleys, matched pairs prevent uneven load and premature wear.
- Photograph readings: Photo evidence of tension gauge and alignment helps trend analysis and audits.
If you’re standardizing your safety program, this complements our overview of Ontario fire safety standards for restaurants and food service teams.
Need a same-night belt swap before tomorrow’s lunch rush? Our certified team services commercial hoods across Ontario with true 24/7 coverage. Bundle belt checks with your next exhaust cleaning to reduce fire risk and paperwork. Learn more about our NFPA 96 certified hood cleaning and our full hood cleaning service in Ontario.
Tools, Checklists, and Resources
- Belt tension gauge: Confirms spec without guesswork.
- Straightedge or laser: Verifies pulley alignment quickly.
- Torque wrench and key set: Secures motor mounts and sheaves to spec.
- Replacement belts: Stock the exact sizes for each fan; store in a dry, cool place away from grease.
- Rooftop safety kit: Harness, anchors, and slip-resistant mats for safe access.
- Maintenance log template: Date, readings, parts used, and next due date—all in one place.
- Filter program: Pair with routine filter exchanges to stabilize system resistance.
| Symptom | Likely Cause | Immediate Action |
|---|---|---|
| Startup squeal | Low tension or glazing | Measure tension; replace if glazed |
| Burnt rubber smell | Belt slip or misalignment | Realign sheaves; set correct tension |
| Fan underperforming | Stretched belt or worn pulley | Install new belt; inspect pulley wear |
| Visible cracks/fray | Heat/age degradation | Replace proactively |
| Sudden stop | Belt snap | Install spare; verify alignment before restart |
Maintenance Planning: Schedules that Actually Work
Plan cadence by menu, volume, and environment. Tie it to your cleaning calendar so nothing slips through the cracks.
Suggested inspection & replacement cadence
- Heavy grease (wok, charbroil, fried chicken): Inspect monthly; replace quarterly or on condition.
- Moderate (mixed grill, pizza, sauté): Inspect every 2 months; replace semiannually.
- Light (bakeries, low-grease prep): Inspect quarterly; replace annually or on condition.
| Concept Type | Grease Load | Inspection | Typical Replacement | Bundle With |
|---|---|---|---|---|
| Wok/Charbroil | High | Monthly | Quarterly | Duct & hood cleaning |
| Mixed Grill | Medium | Every 2 months | Semiannual | Filter exchange |
| Bakery/Low-Grease | Low | Quarterly | Annual/Condition | Hood cleaning |
To streamline planning, align belt checks with your hood cleaning frequency and your team’s filter change routine. Standardizing cadence simplifies audits and keeps airflow reliable.
Common Mistakes to Avoid on the Roof
- Guessing tension: Hand-feel varies by tech. Use a gauge for repeatable results.
- Skipping re-tension: New belts settle; recheck after 24–48 hours of operation.
- Mixing belts: Never pair an old belt with a new one on multi-groove pulleys.
- Ignoring pulley wear: Polished, V-shaped grooves reduce friction and accelerate slip.
- Over-tensioning: Excess load shortens bearing and motor life.
- Neglecting grease cleanup: Residue inside fan bowls shortens belt life and masks leaks.
- Unsafe access: No harness or wet, icy roofs create unacceptable risk—reschedule or call a pro.
Inspection, Documentation, and Ontario Compliance
- Keep a rooftop log: Belt type/size, date, tension, alignment notes, and tech initials.
- Photo proof: Before/after, gauge readings, and sheave alignment shots help trend analysis.
- Tie to cleaning records: Store with your hood, duct, and filter cleaning documentation.
- Show your cadence: During inspections, a clear preventive plan demonstrates due diligence.
- Bundle services: Pair a belt swap with a thorough hood and duct clean to reduce grease accumulation and inspection surprises.
If staff education is part of your program, share our internal write-ups on keeping staff safe during filter changes and exhaust checks.
Real-World Examples from Ontario Kitchens
- QSR chain, Southern Ontario: Peak-hour squeal escalated to a burnt smell. Our tech found an over-polished, loose belt and misaligned sheaves. After replacement and alignment, amp draw fell and capture at the grill face returned to normal. Team reported cooler line temps within 10 minutes.
- Hotel banquet kitchen, GTA: Intermittent smoke haze on carving station. Vibration readings showed bearing wear causing micro-slip. Coordinated belt swap, bearing service, and a deep exhaust clean overnight—no disruption to breakfast service.
- Institutional kitchen, Southwestern Ontario: Filters loading fast due to weak exhaust. Belt measured below spec tension. New matched set and re-tension at 48 hours reduced filter load rate and improved air quality for staff.
- Multi-unit casual dining, Highway 401 corridor: Seasonal rooftop icing led to delayed access. We scheduled a safe-weather window, installed matched belts, and added a re-tension visit to coincide with their next scheduled hood cleaning.
Local Tips
- Tip 1: Schedule rooftop checks around Southern Ontario winds; open fan housings when gusts are low and surfaces are dry.
- Tip 2: In winter, salt and meltwater can track into fan bowls—wipe down after service to protect belts and bearings.
- Tip 3: Align belt checks with your regular hood and duct cleaning cycle so documentation is consistent for inspectors.
IMPORTANT: Our team services restaurants all over Ontario with rapid response in the south—plan proactive swaps before long weekends and patio season.
Pricing Factors and Service Scope
No two rooftop fans are identical, and neither are service needs. Instead of fixating on a single price, consider scope and value.
- Fan configuration: Single vs. multi-groove pulleys, belt profile, and housing access.
- Condition on arrival: Corroded hardware, seized adjusters, or worn sheaves extend labor time.
- Bundled work: Pairing belt service with exhaust, hood, and duct cleaning improves compliance and reduces total disruption.
- Timing: After-hours or emergency calls keep you open but require night or weekend dispatch.
- Documentation: Detailed reports with tension, alignment notes, and photos add long-term value for audits.
FAQ
How often should we replace a commercial hood fan belt?
Most busy kitchens benefit from quarterly inspections and replacement every 3–6 months depending on load and readings. Light-duty environments may go longer with condition-based checks. If you hear squeal, smell burnt rubber, or see glazing or cracks, schedule service immediately.
Can our own staff replace the belt?
Some maintenance teams can handle simple swaps, but rooftop safety, alignment, and tension accuracy are critical. A misaligned or under-tensioned belt fails early and undermines exhaust performance. Certified technicians bring gauges, alignment tools, and rooftop safety gear to get it right the first time.
What’s the risk of running with a slipping belt?
Under-capture at the hood face means more grease condenses on filters, hoods, and inside ducts. That increases fire risk and can cause inspection issues. It also stresses motors and bearings, raising energy use and repair needs.
Should we replace both belts on a dual-sheave setup?
Yes. Matched sets share load evenly. Mixing old and new belts leads to uneven wear, vibration, and slippage. Always install matched pairs and recheck tension after 24–48 hours.
How do we know if alignment is correct?
Use a straightedge or laser across pulley faces; no daylight should show. Track vibration and motor amperage after the swap. If readings drift, recheck alignment and tension and inspect bearings.
Key Takeaways
- Early signs matter: Squeal, smell, and haze are your alerts—don’t ignore them.
- Do it by the numbers: Use alignment tools and a tension gauge; log amp draw.
- Bundle service: Coordinate belt swaps with scheduled exhaust cleaning for compliance and uptime.
- Think seasonal: Ontario weather affects rooftop access and belt life—plan ahead.
Conclusion & Next Steps
- Adopt a realistic inspection and replacement cadence tied to your menu and volume.
- Standardize spare belts, tools, and rooftop safety practices.
- Document tension, alignment, and readings to spot issues early.
- When in doubt—or when time is tight—call a certified 24/7 partner to prevent downtime.
Ready to strengthen exhaust performance across your locations? Our NFPA 96–certified, WSIB-insured team services commercial kitchens all over Ontario with rapid response in the south. Book a discovery session and bundle your next belt swap with a full exhaust cleaning for a safer, cleaner line.