Your kitchen’s exhaust fan is the unsung hero that clears heat, smoke, and grease-laden vapors before they become hazards. When the belt that drives that fan slips, frays, or snaps, airflow drops fast—and so does safety. This complete guide explains fan belt replacement commercial hoods in clear, step-by-step terms, so operators across Ontario know what to watch for, how the process works, and when to bring in an NFPA 96–certified team like Robinhood Cleaners.
At a Glance
- What you’ll learn: How commercial hood fan belts work, failure signs, safe replacement steps, and maintenance schedules.
- Why it matters: Proper belt tension keeps exhaust airflow strong, reduces fire risk, and supports NFPA 96 compliance.
- Who this helps: Restaurant owners, facility managers, and commercial kitchen leaders who want reliable ventilation and fewer breakdowns.
- Local context: Robinhood Cleaners serves kitchens all over Ontario with especially quick response in Southern Ontario—24/7.
- Primary focus: Fan belt replacement commercial hoods done safely, efficiently, and in line with inspection requirements.
Quick Answer
Need fan belt replacement commercial hoods? Robinhood Cleaners delivers NFPA 96–aligned service across All Over Ontario at All Over Ontario. We restore airflow quickly, verify tension and alignment, and document work so your team stays safe and compliant—day or night.
Contents
- What Is Fan Belt Replacement for Commercial Hoods?
- Why Fan Belt Replacement Matters
- How Fan Belt Systems Work
- Step-by-Step Replacement Process
- Types, Methods, and Approaches
- Best Practices
- Tools and Resources
- Inspection Checklists
- Troubleshooting Table
- Maintenance Frequency and Scheduling
- Ontario Scenarios and Mini Case Studies
- Mid-Shift Recovery (If a Belt Snaps)
- Documentation and Compliance
- “Good, Better, Best” Maintenance Model
- Safety Protocols
- Pricing Considerations (No Dollar Figures)
- FAQ
- Key Takeaways + Next Steps
What Is Fan Belt Replacement for Commercial Hoods?
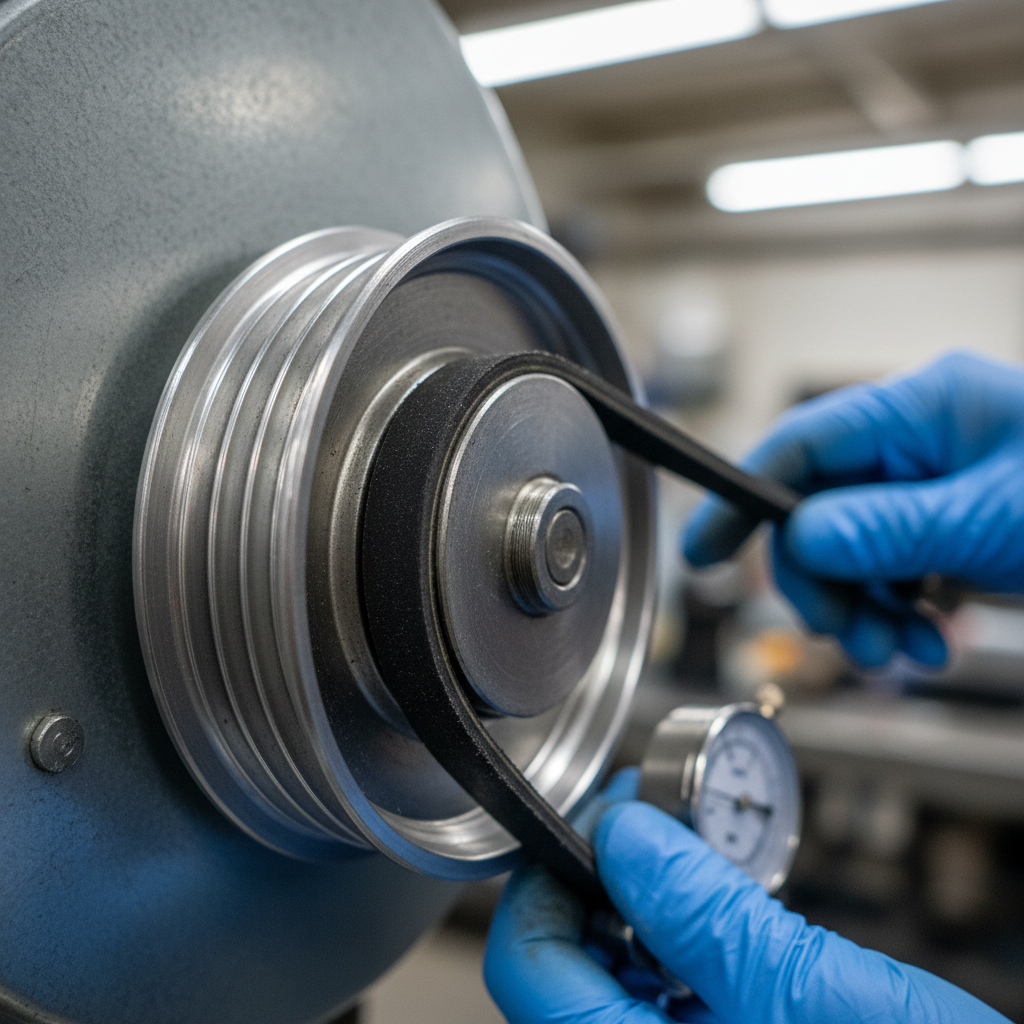
In most restaurant ventilation setups, an electric motor spins a pulley that drives a V-belt. The belt turns the exhaust fan’s pulley (sheave), pulling air through filters, the hood, and ductwork, exhausting it safely outdoors. Replacing the belt means selecting the correct V-belt size and profile, safely removing the worn belt, verifying pulley alignment, installing the new belt, and setting proper tension.
- Common configurations:
- Upblast exhaust fans (rooftop): Belt-driven motors mounted on curb stands; fan throws discharge upward.
- Utility set fans (indoor/outdoor): Belt-driven blowers used where higher static pressure is needed.
- Make-up air units: Sometimes belt-driven; not the hood exhaust but part of the overall airflow balance.
- Primary components:
- Motor and motor pulley (drive sheave)
- Fan pulley (driven sheave) connected to the wheel/impeller
- V-belt (A, B, AX, BX, etc., cogged or classical)
- Motor base or slide rails for tensioning
- Guards, disconnect switch, and curb-mounted housing
- Why belts fail:
- Heat, grease, and weather exposure on rooftops
- Improper tension (too tight or too loose)
- Misaligned pulleys accelerating edge wear
- Contaminants (oil/grease on the belt reduces friction)
- End of service life (rubber hardening, cracking)
Why Fan Belt Replacement Matters
- Stable airflow: A healthy belt keeps CFM performance up so heat and grease vapors don’t linger over the line.
- Fire hazard reduction: Strong exhaust reduces grease accumulation in the hood and ductwork.
- Compliance confidence: Consistent ventilation supports NFPA 96 standards and local inspection outcomes.
- Equipment protection: Correct belt tension prevents motor overamp, bearing damage, and premature fan wear.
- Staff comfort and air quality: Better capture of smoke and fumes means a safer, more comfortable kitchen.
How Fan Belt Systems Work
Think of the belt as the link that turns motor power into fan movement. If that link slips, everything downstream suffers.
- Power flow: Electric motor → motor pulley → V-belt → fan pulley → impeller → exhaust airflow.
- Tension window: Belts need a “Goldilocks” range—too tight stresses bearings; too loose slips, squeals, and overheats.
- Alignment essentials: Pulleys must be coplanar with correct center distance; a straightedge across sheaves should contact evenly.
- Speed and CFM: Pulley diameters set fan speed; incorrect sheave sizing alters performance and noise.
- Environmental load: Grease, moisture, freeze-thaw, and UV can shorten belt life—especially on Ontario rooftops.
- System balance: Filters, makeup air, and duct condition all affect belt load; treat ventilation as one system.
Fan Belt Replacement for Commercial Hoods: Step-by-Step
Here’s a safe, high-level process overview. Always follow lockout/tagout and manufacturer guidance. If you’re unsure, bring in certified technicians.
- Prepare the site
- Confirm unit type and model; verify belt cross-section and length.
- Gather PPE: gloves, eye protection, cut-resistant sleeves, and fall protection for rooftops.
- Set safe access: ladders, roof hatches, and a controlled work zone.
- Lockout/Tagout (LOTO)
- Shut off power at the disconnect; apply lock and tag.
- Test for zero energy—bump test is not a substitute; verify no movement.
- Remove guards and inspect
- Remove belt guards carefully; set hardware aside.
- Check for oil contamination, frayed edges, glazing, and cracks.
- Spin pulleys by hand to feel bearing roughness; note any wobble.
- Release tension
- Back off the motor base or slide rails to slacken the belt.
- Never pry against the belt; avoid nicking sheave grooves.
- Remove and match the belt
- Record size from the old belt if legible; confirm with spec sheet.
- Use the correct cross-section (A, B, AX, BX) and length; cogged belts can run cooler and flex better.
- Inspect and align sheaves
- Use a straightedge across pulley faces; correct angular or parallel misalignment.
- Tighten pulley set screws to the manufacturer’s torque spec.
- Install the new belt
- Seat the belt into grooves without forcing; never roll a belt on by cranking.
- Pre-tension by moving the motor base until moderate finger pressure deflects the belt according to spec.
- Set final tension
- Use a belt tension gauge for accuracy; document reading.
- Re-check after a 24-hour run-in; belts relax slightly once seated.
- Reinstall guards and test
- Restore guards; remove LOTO and start the fan.
- Listen for squeal or chatter; check vibration and motor amps.
- Verify capture at the hood; confirm makeup air balance if needed.
- Document and schedule follow-up
- Log belt size, tension readings, alignment notes, and any parts replaced.
- Schedule re-tension and inspection after the first week of service.
Types, Methods, and Approaches
Different operations and environments call for different belt choices and maintenance strategies.
Belt Types
- Classical V-belts (A, B): Reliable, widely available, suitable for many rooftop exhaust fans.
- Cogged/notched (AX, BX): Run cooler, flex easier around small pulleys, can reduce slippage.
- Banded belts: Multiple belts fused together for higher loads; used in some utility fans.
- Link belts: Field-adjustable; helpful for emergency use when exact size isn’t on hand.
Maintenance Approaches
- Run-to-failure (not recommended): Wait until the belt fails; causes downtime and airflow loss.
- Preventive replacement (smart default): Replace on a fixed interval based on run hours and environment.
- Condition-based: Replace when wear indicators show glazing, fray, cracking, or elongation beyond spec.
- Predictive (advanced): Monitor vibration and motor current; trend data to forecast belt or bearing issues.
Replacement Methods
- Like-for-like swap: Same cross-section and length; verify manufacturer spec.
- Performance re-sheaving: Engineering adjustment of pulley diameters to correct fan speed and CFM (use experts).
- Alignment correction: Use alignment tools to extend belt and bearing life.
Best Practices (Field-Tested)
- Keep a labeled spare on site: Store one new, bagged belt per fan. Label with unit ID and size.
- Use a tension gauge: Guessing leads to under- or over-tension. Measure and document.
- Re-tension after 24–48 hours: Belts settle. A quick follow-up preserves performance.
- Clean sheaves: Degrease pulley grooves; residue causes slip and glazing.
- Check alignment every time: A straightedge is cheap insurance against edge wear.
- Guard everything: Replace belt guards and confirm no pinch points before energizing.
- Record readings: Tension, amps, vibration, and any anomalies. Trend over time.
- Pair with filter maintenance: Heavy filter load increases static pressure and belt strain. See our internal insights on exhaust filter replacement and filter maintenance tips.
- Keep motors dry: Protect from rain and snow infiltration; check rooftop curbs and hoods.
- Verify makeup air: Balanced systems reduce strain; airflow works as a team sport.
Tools and Resources You’ll Use
- PPE: Gloves, eye protection, hearing protection, and rooftop fall arrest.
- LOTO kit: Locks, tags, and a procedure checklist.
- Belt tension gauge: Essential for accurate setpoints.
- Straightedge/laser alignment tool: For sheave alignment checks.
- Torque wrench: To set sheave and guard hardware per spec.
- Degreaser and rags: Clean grooves before installing the new belt.
- Spare belts and hardware: Labeled by unit; keep in a dry storage bin.
- Inspection log: Simple template listing unit ID, readings, and next check date.
Inspection Checklist (Use This Structure)
- Before you start: Verify model/serial, belt size, access, weather safety, and LOTO.
- During replacement: Alignment, sheave condition, belt seating, tension reading, guard integrity.
- After start-up: Noise check, vibration feel, amp draw vs. nameplate, hood capture performance.
- Documentation: Date/time, readings, photos, and planned recheck.
Common Symptoms, Root Causes, and Fixes
| Symptom | Likely Cause | Risk | Recommended Fix |
|---|---|---|---|
| Squealing on startup | Under-tensioned or oily belt | Heat, glazing, slip | Degrease sheaves; set proper tension with gauge |
| Edge fray and black dust | Pulley misalignment | Accelerated wear, snap risk | Realign sheaves; replace belt |
| Fan slow, poor capture | Loose belt or wrong size | Grease accumulation in ducts | Correct belt; set tension; verify filters and airflow |
| Hot motor, high amps | Over-tensioned belt | Bearing damage risk | Reduce tension to spec; recheck after run-in |
| Chatter and vibration | Worn bearings or cracked belt | Failure during service | Inspect bearings; replace belt; schedule bearing service |
Maintenance Frequency and Scheduling
- Monthly visual checks: Look for fray, glazing, belt dust, or oil contamination.
- Quarterly tension checks: Confirm with a tension gauge; document reading and ambient conditions.
- After heavy cleaning cycles: Pair with hood and duct cleaning to verify performance remains in spec.
- Seasonal considerations: Ontario’s freeze-thaw cycles can affect rooftop components; add spring/fall checks.
- After filter changes: Pulled-down static pressure shifts loads—reconfirm belt performance.
- During peak seasons: Add pre-peak re-tension for patios, festivals, and holidays.
Local Operations: Ontario Kitchens, Real Scenarios
- Downtown rush (Toronto): A clogged filter caused belt slip during dinner. Our team restored airflow and guided a new filter schedule aligned with restaurant fire safety priorities.
- Storm aftermath (Hamilton): Wind-driven rain saturated a belt; we replaced it, dried the housing, and sealed a curb gap.
- Holiday volume (Mississauga): Added preventive re-tension mid-season to handle extended hours.
- Campus kitchen (London): Condition-based swap after vibration trending showed emerging slip.
- Hospitality strip (Niagara): Switched to cogged belts for tight pulleys, reducing heat and noise.
- Waterfront exposure (Windsor): UV and moisture degraded belts; we implemented a semi-annual schedule.
- Mall food court (Kitchener): Multi-tenant fans re-sheaved to correct speeds across varying loads.
- Industrial park (Burlington): LOTO refresher and guard upgrades during belt service.
- Resort area (Collingwood): Post-cleaning recheck ensured peak capture in peak season.
- Transit hub (Oshawa): Evening service minimized downtime; post-run tension verified next day.
- Tour corridor (Kingston): Belt dust led to alignment fix and documented inspection trail for audits.
- Catering facility (Guelph): Spare-belt labeling by unit simplified after-hours swaps.

Local Tips
- Tip 1: If your restaurant is near high-traffic corridors (like the QEW or Highway 401), schedule rooftop belt checks after major wind events—debris can lodge under guards and affect tension.
- Tip 2: Ontario winters can ice up curb areas. Add a quick visual check after freeze-thaw cycles to catch slippage before the dinner rush.
- Tip 3: For late-night venues and hotels, align belt service with your hood cleaning window. Robinhood Cleaners can bundle replacement with cleaning to minimize downtime.
IMPORTANT: These tips align with Robinhood Cleaners’ certified, 24/7 approach for commercial kitchens across Ontario.
Mid-Shift Recovery: What To Do If the Belt Snaps
- Stay calm and safe: Reduce or pause cooking to prevent smoke accumulation.
- Check makeup air: Avoid pressurization problems; keep doors closed to limit draft pathways.
- Inspect guards (power off): Confirm the issue is the belt, not jammed debris or a broken sheave.
- Use your labeled spare: If trained, perform a safe swap using your written procedure and LOTO.
- Call certified support: When in doubt, contact Robinhood Cleaners for 24/7 help across Ontario.
Documentation and Compliance
- Service logs: Record belt ID, measurements, and inspector notes.
- Photo evidence: Before/after images help with audits and staff training.
- Alignment/tension data: Keep recurring readings to spot patterns early.
- Pair with NFPA 96 practices: See our public overview of NFPA 96–aligned hood cleaning for broader context.
“Good, Better, Best” Maintenance Model
- Good: Keep spares, inspect monthly, tension quarterly, and log results.
- Better: Add post-cleaning and seasonal checks, plus 24–48 hour re-tension.
- Best: Implement condition-based triggers, vibration/motor-amp trending, and annual alignment audits.
Safety First: Rooftop and Kitchen Protocols
- LOTO every time: Never work on a live drive.
- Fall protection: Harnesses, anchors, and controlled access to roof ladders.
- Guards in place: No test runs with exposed belts or pulleys.
- Weather watch: Avoid icy or high-wind conditions when accessing fans.
- Clean workspace: Wipe grease and debris to prevent slips.
- Two-tech rule (recommended): For rooftop night work, use a buddy system with radios.
Soft CTA: Want a same-night visit? Our certified team can inspect, replace, and document your hood fan belt while we clean your exhaust system—one coordinated service window across Ontario. Explore our commercial hood cleaning service options.
Pricing Considerations (No Dollar Figures)
- Scope of work: Single belt vs. multiple units; simple swap vs. alignment correction.
- Access and safety: Rooftop height, harness points, and after-hours requirements.
- Condition on arrival: Contamination cleanup, seized hardware, or worn sheaves.
- Documentation needs: Detailed NFPA 96 logs and photo packages for audits.
- Bundled services: Combining with hood, duct, and filter cleaning can reduce disruption.
- Emergency vs. scheduled: Urgent callouts vs. planned maintenance windows.
FAQ
How often should a commercial hood fan belt be replaced?
There’s no single interval for every kitchen. In Ontario’s conditions, we recommend monthly visual checks, quarterly tension checks, and condition-based replacement when you see fray, glazing, cracking, or persistent slip. Many operators also add a proactive changeout ahead of peak seasons.
What are the top signs my belt needs attention?
Squealing on start-up, black belt dust near the guard, visible edge fray, a glossy “glazed” belt face, poor capture at the hood, or rising motor amps. If two or more appear together, schedule service soon.
Can my kitchen operate during a belt replacement?
It depends on your ventilation dependency and airflow needs. Many restaurants pause heavy cooking and keep a light line going while the swap happens off-hours. We often combine belt replacement with hood cleaning to limit downtime.
How do I know the correct belt size?
Check the unit data plate and manufacturer literature. The old belt may show markings (if legible). A certified technician can also measure pulley center distance and sheave sizes to confirm the correct cross-section and length.
Is direct-drive better than belt-drive for kitchen exhaust?
Direct-drive removes belts from the equation, but belt-driven upblast fans remain common because they’re robust and easy to service. If you’re considering re-sheaving or equipment changes, consult a specialist to ensure airflow targets and code requirements stay on track.
Key Takeaways + Next Steps
- Belts are small, impact is huge: Ventilation safety and compliance rely on healthy belts.
- Measure, don’t guess: Use a tension gauge, check alignment, and document.
- Bundle maintenance: Coordinate belt swaps with hood and filter cleaning for one window.
- Local reliability: Robinhood Cleaners serves all of Ontario with fast response in Southern Ontario, 24/7.
Next steps:
- Schedule a fan belt assessment alongside your next hood cleaning.
- Stage labeled spare belts by unit to speed emergency swaps.
- Adopt a simple log for tension, alignment, and rechecks.
Ready for certified help? Explore our NFPA 96–aligned service approach in this overview, then coordinate your next service window.
Final CTA: Book a belt and ventilation check anywhere in Ontario—Robinhood Cleaners is on call 24/7 with quick service in Southern Ontario. Let’s keep your airflow strong and your team safe.