When a rooftop exhaust fan belt slips or snaps, your hood can’t capture grease-laden vapor. That’s when smoke rolls out, heat builds up, and inspections get tricky. This Expert 2026 Guide to fan belt replacement for commercial hoods is written for Ontario restaurants and institutional kitchens that want safe, reliable airflow—without surprises. We’ll keep the language clear and the steps practical, based on what our NFPA 96–certified, WSIB‑insured team at Robinhood Cleaners sees across All Over Ontario every day.
- Spot early warning signs a hood fan belt is failing.
- Replace, tension, and align belts correctly on rooftop upblast fans.
- Pair belt service with hood, duct, and filter cleaning for better capture.
- Set a spare-belt policy and service cadence that prevents downtime.
- Plan safe rooftop access around Ontario seasons and weather.
Quick Answer
Replace hood fan belts the moment you hear squealing, see fraying or glazing, or notice reduced capture at the hood. In All Over Ontario at All Over Ontario, Robinhood Cleaners integrates fan belt replacement for commercial hoods with NFPA 96–aligned exhaust, hood, and duct cleaning—24/7 with fast response in Southern Ontario.
At a Glance
- Primary topic: fan belt replacement commercial hoods—what it is, why it matters, and how to do it safely.
- Intent: Informational for kitchen managers, owners, and facility teams.
- Standards: NFPA 96 expectations for safe, reliable commercial cooking ventilation.
- Services tie‑in: Robinhood Cleaners provides Kitchen Exhaust Cleaning, Filter Cleaning & Exchange, Fan Belt Replacement, Equipment Cleaning, Grease Trap Service, and Power Washing.
Table of Contents
- What Is Fan Belt Replacement for Commercial Hoods?
- Why Fan Belts Matter for Safety and Compliance
- How Belt‑Driven Rooftop Exhaust Fans Work
- Approaches: Reactive vs Proactive Maintenance
- Belt, Sheave, and Mount Types
- 12 Signs Your Belt Needs Attention
- Step‑by‑Step: Safe Rooftop Belt Replacement
- Tension, Alignment, and Run‑in Checks
- Best Practices (NFPA 96–Aligned)
- Tools and Resources
- Ontario Rooftop and Seasonal Tips
- Integrating with Hood, Duct, and Filter Cleaning
- Ontario Case Snapshots
- Pricing Considerations (No Dollar Amounts)
- FAQ
- Key Takeaways
- Next Steps & 24/7 Support
Local Tips
- Tip 1: Schedule rooftop work outside peak winds along Lake Ontario to keep lids and windbands manageable and reduce service interruptions.
- Tip 2: Before winter, confirm hinged upblast fans open easily and belts aren’t brittle from cold snaps; ice can hide on membrane roofs.
- Tip 3: After busy event weekends, bundle a belt check with your hood and duct cleaning to handle the surge in grease load efficiently.
IMPORTANT: Robinhood Cleaners serves All Over Ontario with quick response in Southern Ontario—NFPA 96–certified and WSIB insured, 24/7.
What Is Fan Belt Replacement for Commercial Hoods?
Fan belt replacement for commercial hoods is the process of removing a worn or damaged drive belt on a rooftop upblast exhaust fan and installing a new, properly sized belt at the correct tension and alignment. The belt connects the motor sheave to the fan pulley, allowing the motor to spin the blower wheel and move air through the hood, baffle filters, ducts, and out above the roofline.
- Goal: Restore designed RPM and airflow so hoods capture grease‑laden vapors as intended.
- Outcome: Lower fire risk, better kitchen comfort, and fewer inspection issues.
- Who should do it: Trained, insured technicians with rooftop safety skills and NFPA 96 familiarity.
Why Fan Belts Matter for Safety and Compliance
- Capture performance: Even a small RPM drop can reduce hood capture, letting smoke and grease escape.
- Fire hazard control: Effective exhaust removes a fuel source—grease aerosols—from the cook line.
- Equipment health: Correct tension prevents bearing overload and shaft misalignment.
- Compliance lens: NFPA 96 expects ventilation systems to operate as designed; a failing belt undermines that.
- Staff comfort: Stable airflow improves air quality and reduces heat stress during rushes.
How Belt‑Driven Rooftop Exhaust Fans Work
- Motor to sheave: A motor spins a drive sheave (pulley) at set RPM.
- Belt to fan pulley: The belt transmits torque to the fan pulley and blower wheel.
- Negative pressure: The fan creates suction at the hood, pulling air through baffle filters and ducts.
- System effects: Dirty filters or duct restrictions increase static pressure, which can magnify belt slip.
- Heat and grease reality: High heat glazes belts; grease contamination causes slip and premature wear.
Approaches: Reactive vs Proactive Maintenance
You can wait for a failure or prevent it. Kitchens that choose proactive service avoid smoky dining rooms and late‑night shutdowns.
- Reactive approach:
- Run until the belt slips or snaps; call for emergency service.
- Risk: smoke rollback, heat buildup, and stressed bearings.
- Often reveals underlying issues (worn sheaves, misalignment).
- Proactive approach:
- Inspect belts monthly; replace at first signs of wear or glazing.
- Stock labeled spares on site; standardize belt SKUs chain‑wide.
- Bundle checks with Filter Cleaning & Exchange to keep static pressure down.
Belt, Sheave, and Mount Types
- V‑belts (A/B/C sections): Common on restaurant upblast fans; profile and length must match exactly.
- Notched V‑belts: Better flex on small pulleys; typically run cooler with less slip.
- Matched sets: Multi‑belt drives require matched belts; always replace as a set.
- Adjustable sheaves: Allow fine‑tuning of RPM; document settings before changes.
- Fixed sheaves: Fewer variables; inspect grooves for wear or bottoming.
- Hinged upblast bases: Safer access and less wiring stress—ideal for Ontario rooftops.
12 Signs Your Belt Needs Attention
- Squeal at startup: Classic low‑tension or glazing symptom.
- Chirp under load: Misalignment or edge wear.
- Visible cracks/fraying: Age and heat damage.
- Shiny, glassy sidewalls: Belt glaze from slip.
- Black dust near sheaves: Rubber wear.
- More smoke at the hood: Reduced capture equals airflow loss.
- Hot motor housing: Over‑tensioning increases load.
- Wobbling fan pulley: Misalignment or bent shaft.
- Excessive deflection: More than ~1/2 inch on a typical span.
- Breaker trips: Binding from improper tension.
- Rattling windband: Imbalanced components.
- Belt slapping: Severe slack or wrong length.
Step‑by‑Step: Safe Rooftop Belt Replacement
Always follow site policy, NFPA 96 principles, and the fan manufacturer’s instructions. Here’s a field‑tested sequence our Ontario crews use.
1) Prepare and De‑energize
- Choose a window outside peak service (early morning is best).
- Lockout/tagout the disconnect; verify zero energy with a tester.
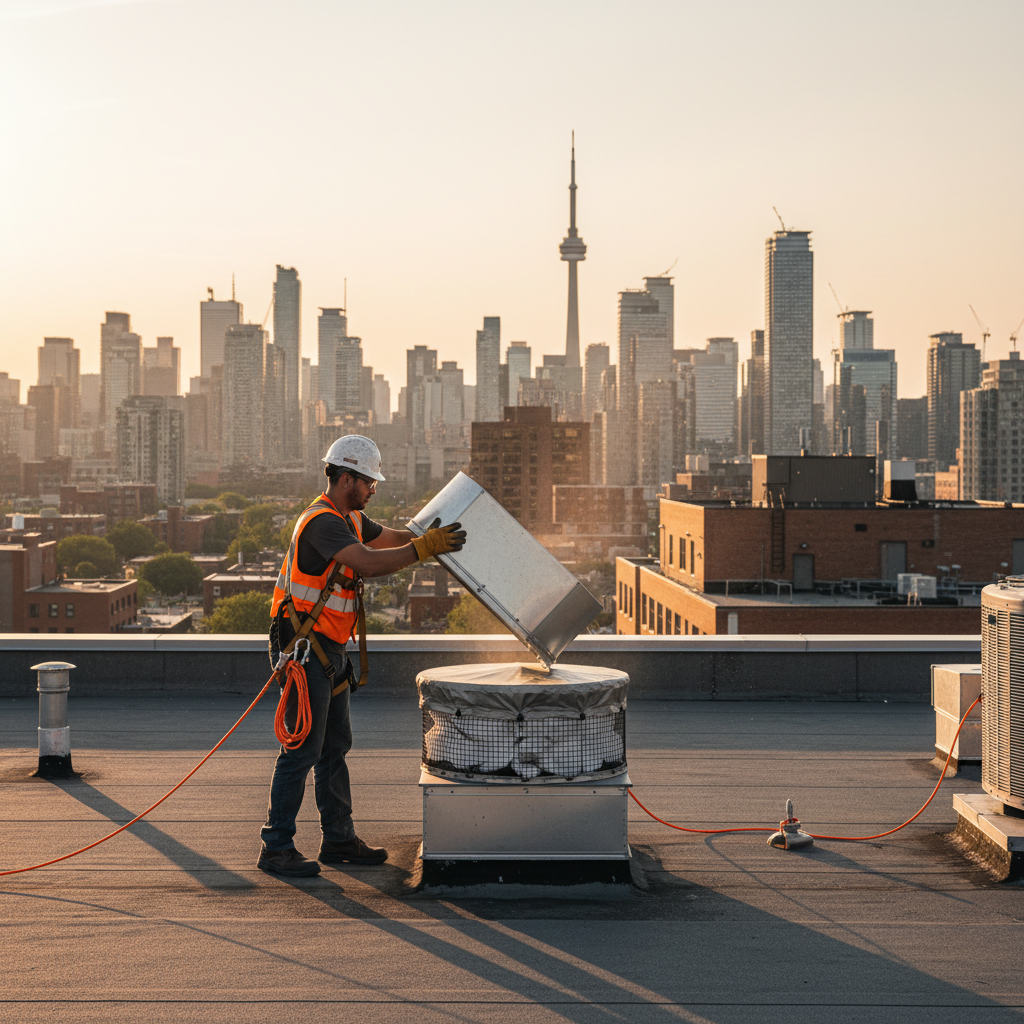
- Set fall protection, cones, and safe tool staging.
2) Access the Drive
- Open the hinged fan; if unhinged, lift carefully without stressing wiring.
- Remove windband/guards to expose sheaves and belt.
- Check grease containment for overflow risks while working.
3) Inspect Before Removal
- Photograph belt routing and sheave faces.
- Record belt part number, profile, and sheave settings (if adjustable).
- Spin blower by hand; note bearing roughness or scraping.
4) Remove the Old Belt
- Back off motor mounts to release tension.
- Walk the belt off; avoid prying that can nick pulleys.
- Brush sheave grooves clean; avoid harsh solvents on rubber.
5) Install the New Belt
- Confirm exact profile/length; use matched sets on multi‑belt drives.
- Fit around fan pulley first, then motor sheave.
- Hand‑tension by sliding motor to just remove slack.
6) Set Tension and Alignment
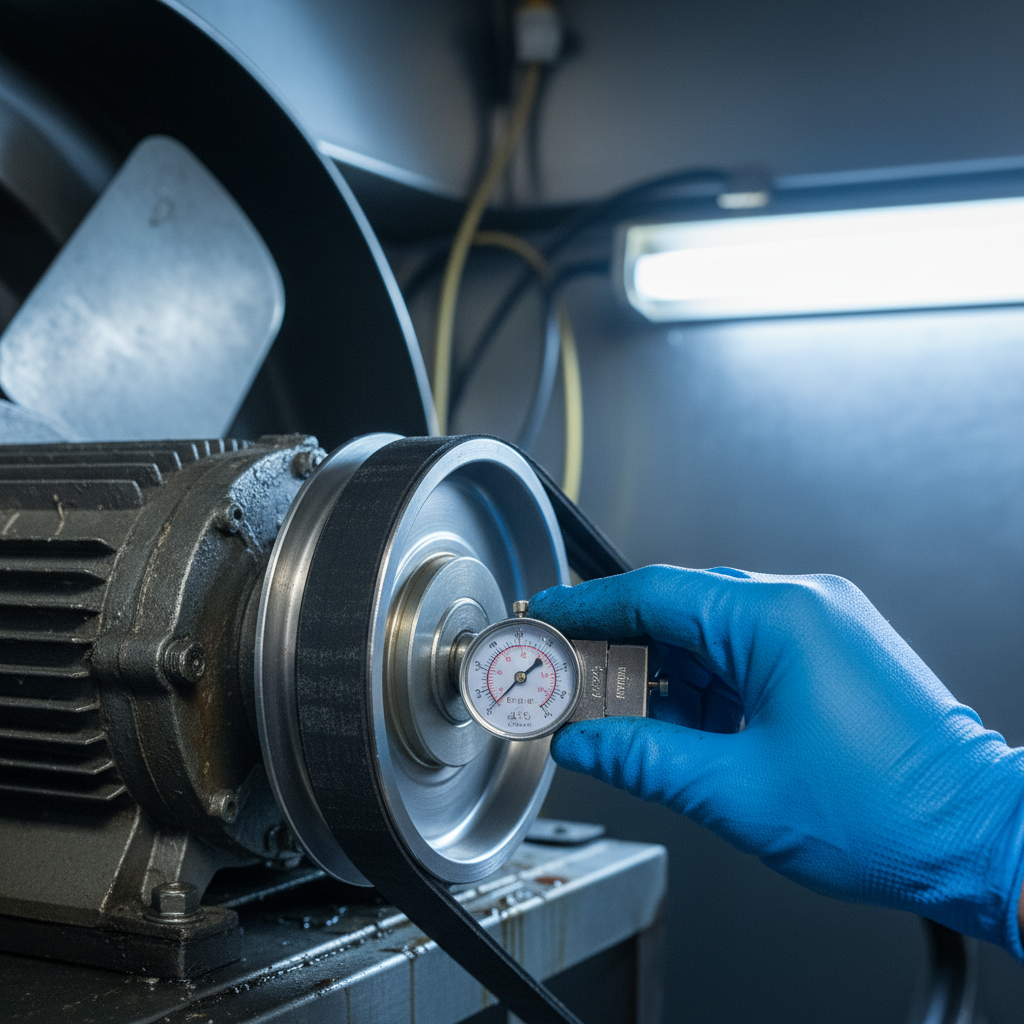
- Use a belt tension gauge; guessing leads to repeat calls.
- Align with a straightedge across sheave faces.
- Tighten motor mounts evenly; recheck gauge reading.
7) Test and Re‑inspect
- Clear tools; re‑energize and observe startup.
- Listen for squeal; watch for smooth spin and steady discharge.
- Verify capture at the hood with a tissue or smoke test.
- Recheck tension after 24–48 hours of run‑in.
Tension, Alignment, and Run‑in Checks
Proper tension and alignment protect bearings and keep RPM where it should be.
Tension Targets
- Deflection rule: About 1/64 inch per inch of span under moderate force (e.g., ~1/2 inch at 32 inches). Use a gauge for accuracy.
- Avoid over‑tension: If the motor housing runs hot or hums, ease tension slightly.
- Run‑in: New belts settle; retest tension after the first two days.
Alignment Checks
- Parallel shafts: Shim as needed so motor and fan shafts are parallel.
- Coplanar sheaves: Straightedge across faces; correct any angular offset.
- Groove wear: If the belt bottoms in the groove, replace the sheave.
Lubrication Do’s and Don’ts
- Do lubricate bearings per manufacturer intervals.
- Don’t spray belt dressings to “quiet” noise; fix tension/alignment instead.
- Do keep grooves and surroundings free of grease to reduce slip.
Best Practices (NFPA 96–Aligned)
- Document details: Belt size, brand, install date, gauge reading, and technician.
- Stock spares: Keep two matched belts per fan on site, labeled by fan ID.
- Use hinges: Hinged upblast bases enable faster, safer service in all seasons.
- Bundle tasks: Combine belt checks with exhaust fan service and belt inspections.
- Validate capture: Smoke or tissue test at the hood after drive work.
- Seasonal safety: Ontario wind, snow, and heat demand PPE and deliberate pacing.
Tools and Resources
- Belt tension gauge: For repeatable, manufacturer‑aligned tensioning.
- Straightedge or laser: Quick alignment verification across sheave faces.
- Non‑contact tachometer: RPM confirmation when troubleshooting capture issues.
- Hand tools: Socket set, wrenches, and screwdrivers for guards and mounts.
- Safety gear: Harness, lanyards, roof anchors, gloves, and eye protection.
- Spare belts: Exact profile and length; matched sets for multi‑belt drives.
| Symptom | What You Notice | Probable Cause | Action |
|---|---|---|---|
| Startup squeal | Short squeal on power‑up | Low tension or glazing | Retension or replace |
| Edge fray | Chirping, visible threads | Misalignment | Realign sheaves |
| Glazed belt | Shiny sides, black dust | Heat and slip | Replace and clean grooves |
| Hot motor | Housing heat, smell | Over‑tensioned belt | Reduce tension |
Ontario Rooftop and Seasonal Tips
- Wind management: Secure windbands and lids; control loose tools on gusty days.
- Winter traction: Ice forms fast on membranes—use traction devices and slow, deliberate movement.
- Summer heat: Rotate technicians and hydrate; metal surfaces get hot.
- Storm timing: Postpone non‑urgent rooftop work during lightning or active storms.
- After snowfall: Clear access; check that hinges aren’t frozen before lifting.
Integrating with Hood, Duct, and Filter Cleaning
- Filters first: Clogged baffles raise static pressure and can trigger belt slip.
- Hood and duct cleaning: Less grease in ducts means a cleaner drive and fewer slip issues.
- Fan service bundle: Pair belt work with exhaust fan service and scheduled hood/duct cleaning.
- Documentation: Keep photos, tension readings, and service logs together for inspectors.
Ontario Case Snapshots
1) Downtown Grill Line, Southern Ontario
- Problem: Lunch‑rush smoke rollback and a high‑pitched squeal.
- Findings: Glazed A‑section belt, misaligned adjustable sheave, overdue filters.
- Action: New matched belt, realigned sheaves, Filter Cleaning & Exchange, same‑visit hood cleaning.
- Result: Quieter startup and steady capture at sauté.
2) Hotel Banquets, GTA Corridor
- Problem: Belt snapped during a weekend event; kitchen turned smoky.
- Findings: No on‑site spares; previous over‑tension accelerated wear.
- Action: Emergency call, new belt set by gauge, labeled spares stored on site.
- Result: Downtime avoided next event; added monthly belt checks.
3) Multi‑Unit Quick‑Serve, Provincial Footprint
- Problem: Inconsistent capture across locations.
- Findings: Mixed belt profiles and worn pulleys; lack of hinges slowed service.
- Action: Standardized SKUs, replaced bad sheaves, added hinges, synced cleaning cadence.
- Result: Predictable airflow, faster service visits, cleaner ducts.
Pricing Considerations (No Dollar Amounts)
Because every kitchen is unique, scope drives the investment. Discuss these variables with your provider:
- Fan setup: Single vs. multi‑belt, adjustable vs. fixed sheaves.
- Access: Hinged vs. non‑hinged, roof height, and safe pathways.
- Condition: Bearing health, sheave wear, grease accumulation near the drive.
- Coordination: Bundling with filter service and hood/duct cleaning to limit visits.
- Scheduling: Night or weekend work to avoid production impact.
- Documentation: Photo logs and NFPA 96 compliance records.
FAQ
How often should we replace a hood fan belt?
Inspect monthly and replace proactively at the first signs of wear, glazing, or slack. Many Ontario kitchens swap belts every 6–12 months depending on runtime and heat. Always recheck tension 24–48 hours after a new install.
Can we just tighten a slipping belt?
Sometimes. If a belt isn’t cracked or glazed and sheaves are clean, a measured tension increase may help. Chronic slip usually points to glazing, contamination, or wrong sizing—don’t over‑tighten; that overheats bearings.
What belt size do we need?
Use the belt’s part number and profile (A/B/C) with exact length. If unreadable, measure the old belt and pulley diameters or check equipment docs. Multi‑belt drives require matched sets from the same manufacturer.
Why is the new belt still noisy?
Likely misalignment, under‑tension, contaminated grooves, or worn sheaves. Verify with a straightedge and a tension gauge. A brief run‑in sound can be normal; ongoing noise means recheck setup.
Is a hinged upblast fan worth it?
Yes. Hinges enable safer, faster service, protect wiring, and help in winter. They support NFPA 96 serviceability expectations and cut time on the roof during routine cleaning and belt work.
Key Takeaways
- Replace at the first clear sign of wear—don’t wait for a snap mid‑rush.
- Use a tension gauge and straightedge; guessing leads to repeat issues.
- Label belt sizes, stock matched spares, and document sheave settings.
- Bundle belt service with hood, duct, and filter replacement to protect capture.
- Plan rooftop safety around Ontario weather; hinges help every time.
Next Steps & 24/7 Support
- Book a belt and capture check: We’ll confirm tension, alignment, and airflow performance.
- Bundle services: Pair belt work with exhaust, hood, duct, and filter service to minimize downtime.
- Get compliance docs: Receive photo reports and NFPA 96–aligned records for inspections.
- Anytime scheduling: We operate 24/7 across Ontario, with fast Southern Ontario response.