Commercial exhaust fan belt replacement is the professional removal and installation of the drive belts that power rooftop and inline kitchen exhaust fans. In All Over Ontario, proactive fan belt replacement for commercial exhaust systems stabilizes ventilation, reduces fire risk, and prevents revenue-killing downtime. Robinhood Cleaners performs this service alongside full hood, duct, and exhaust maintenance.
By Robinhood Cleaners • Last updated: 2026-04-26
At a Glance: Summary
Commercial exhaust fan belt replacement prevents sudden fan failures, smoke rollback, and grease-laden air in kitchens. Replace belts proactively every 6–12 months or at the first sign of fraying, glazing, or squeal. Professional service verifies pulley alignment, correct tension, and motor health to protect airflow and fire safety.
This complete guide is written for restaurants, quick service, food courts, and institutional kitchens across Ontario. Use it to keep your exhaust airflow reliable and inspection-ready.
- Understand how belts drive commercial exhaust fans and what happens when they slip
- Spot early wear: squeal, glazing, rubber dust, and edge fray
- Follow a clear 7-step replacement process our technicians use nightly
- Adopt best practices that extend belt life and keep capture rates steady
- Coordinate belts with hood, duct, and filter service for safer operations
Table of contents
- What is commercial exhaust fan belt replacement?
- Why fan belts matter for safety and compliance
- How the fan drive works
- Belt types and how to choose
- How to diagnose belt problems quickly
- 7-step professional replacement process
- Maintenance schedule and checklist
- Integrating belts with hood, duct, and filter service
- Best practices to extend belt life
- Tools, safety, and resources
- Case studies: Ontario kitchens we’ve helped
- Pricing factors and scheduling considerations
- Frequently asked questions
- Key takeaways
Local considerations for All Over Ontario
- Seasonal temperature swings across Southern Ontario can change belt tension. Schedule quick rechecks after the first hot week of summer and the first deep freeze of winter.
- Holiday peaks and festival seasons increase cooking volume. Plan pre-peak inspections so a worn belt doesn’t fail during rush periods.
- Rooftop access can be icy or windy. Use WSIB-insured pros with fall protection and proper lockout-tagout when servicing fans.
What Is Commercial Exhaust Fan Belt Replacement?
Commercial exhaust fan belt replacement is the service of removing a worn V-belt or synchronous belt and installing a correctly sized, tensioned, and aligned new belt on the motor and fan drive. The goal is steady airflow through hoods and ducts, which supports safety, comfort, and code compliance.
In every belt-driven kitchen exhaust system, the motor turns a small pulley that transfers motion to a larger pulley on the fan shaft. The belt is the link. When it slips or snaps, airflow can drop suddenly and smoke can roll back into the kitchen. That’s why a proactive replacement plan matters for busy Ontario operations.
Robinhood Cleaners pairs fan belt replacement with full ventilation optimization service so the drive, hood, filters, ducts, and fan all work as one system.
Why Fan Belts Matter for Safety, Ventilation, and Compliance
A healthy fan belt safeguards airflow, smoke capture, and grease removal. Stable ventilation lowers fire risk, protects indoor air quality, and helps kitchens meet standards like NFPA 96. Ignored belts lead to smoke rollback, hot kitchens, tripped breakers, and emergency closures.
When airflow collapses, grease vapor isn’t captured efficiently. Duct interiors load faster with residue, hood filters saturate, and staff comfort drops. In our experience across Southern Ontario, a slipping or broken belt is one of the top three sudden ventilation failures—alongside seized bearings and electrical faults that shut fans down at the worst moments.
To keep fire risk down and inspections smooth, we align belt service with exhaust fire-hazard reduction best practices and document findings for your records.
How the Commercial Exhaust Fan Drive Works
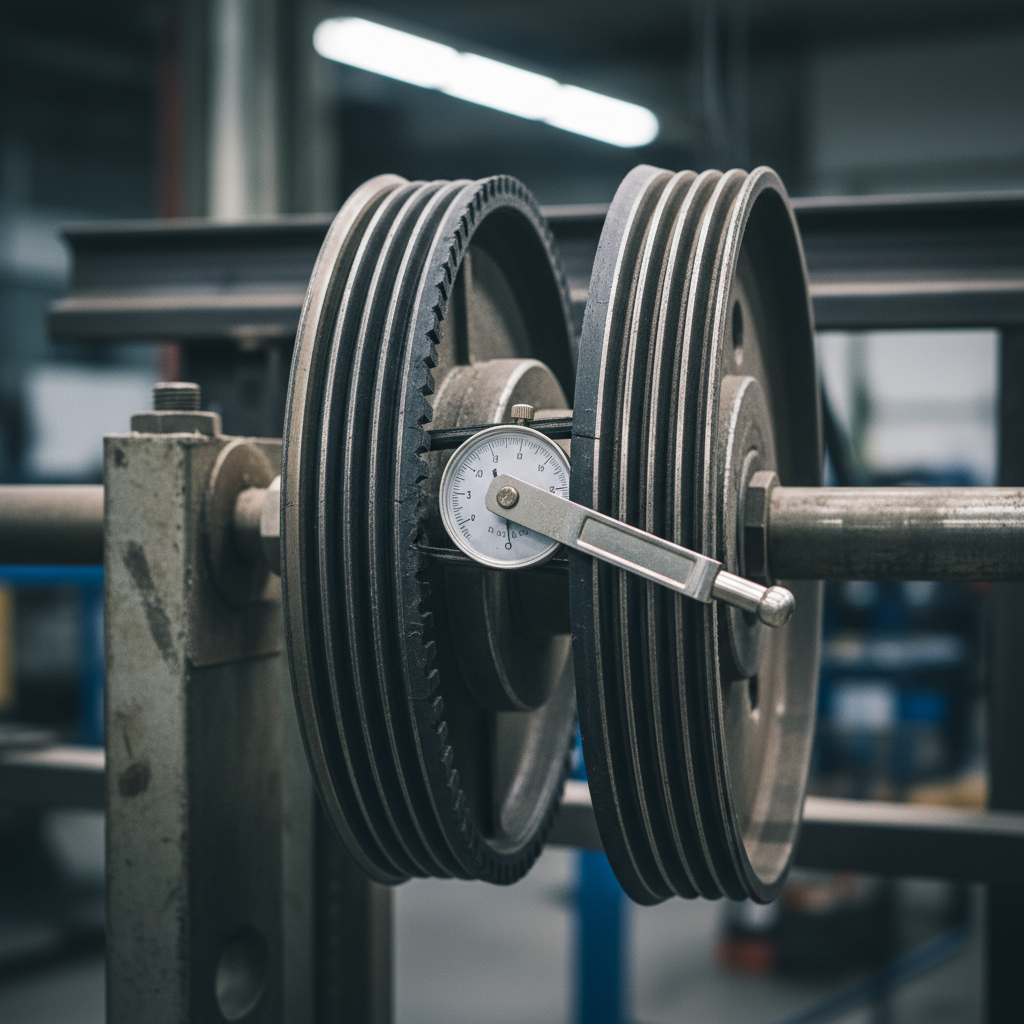
Most commercial exhaust fans use an electric motor, a driver pulley, a driven pulley on the fan shaft, and a belt that transfers torque. Correct pulley alignment and belt tension prevent slip, heat, and noise, ensuring the fan holds its target airflow across service hours.
Think of the belt as a friction-based coupling. If the belt is too loose, it slips, squeals, and polishes the sidewalls (glazing). If it’s too tight, bearings run hot and fail early. Alignment errors create edge wear and vibration. The sweet spot is consistent belt grip with minimal heat, low vibration, and uniform wear over months of operation.
- Alignment: Pulley faces should be co-planar; use a straightedge or laser to check quickly from multiple angles.
- Tension: A quick 90-degree twist check is helpful, but verify with a belt tension gauge to confirm deflection.
- Sheave condition: Worn sheaves show a polished, cupped groove. Replace or re-bore when wear is visible.
- Electrical load: Monitor motor amperage before and after tensioning; excessive draw signals misalignment or over-tension.
For operators, a 15-minute visual check weekly and a documented PM every quarter reduce unplanned stops dramatically. That cadence fits well with filter swaps and hood cleaning night schedules.
Belt Types, Sizing, and When to Use Each
Choose belt types based on fan load, pulley size, temperature, and space. Classic V-belts fit most rooftop fans; cogged variants run cooler on smaller sheaves; synchronous belts hold ratio with no slip but require precise alignment and tension.
Selecting belts isn’t guesswork. You match the profile (A, B, etc.), effective length, and construction to the fan’s speed and torque. Kitchens with frequent start-stop duty and tight bend radii often benefit from cogged V-belts for cooler operation. Where slippage is unacceptable—like variable-speed make-up air drives—synchronous belts shine. We confirm profile and length by reading the existing belt code and cross-referencing manufacturer charts before installation.
| Belt type | Best use | Pros | Watch-outs |
|---|---|---|---|
| Classic V-belt (A/B) | Standard rooftop upblast fans | Widely available; forgiving tension window | Can glaze under slip; needs re-tension after run-in |
| Cogged V-belt (AX/BX) | Smaller sheaves; higher heat | Runs cooler; flexes easier | Slightly louder; must check groove depth |
| Synchronous (timing) | No-slip ratios; VFD systems | Precise speed; efficient | Demands perfect alignment; higher shock load on shafts |
Not sure which profile you have? Our fan belt maintenance guide explains quick identification steps and safe on-roof checks you can do before service night.
How to Diagnose Belt Problems Quickly
Look for rubber dust near guards, belt squeal on startup, polished sidewalls (glazing), edge fray, or a burnt smell. Check capture at the hood with a napkin test. Confirm alignment and tension with a straightedge and gauge before assuming the motor is at fault.
Here’s a simple same-day diagnostic flow that catches most issues fast without special tools. It’s practical for managers and maintenance leads who need a go/no-go decision before the dinner rush.
- Sound and smell: Squeal or a warm rubber odor points to slip—often tension or glazing.
- Visuals: Rubber dust inside guards, frayed edges, or cracks mean the belt is near end-of-life.
- Capture test: Hold a napkin at the hood edge—if pull is weak or fluctuating, suspect the drive.
- Spin test: With power isolated, rotate the fan shaft by hand. Roughness suggests bearing issues compounding belt wear.
- Alignment check: Use a straightedge across sheave faces. Any visible gap implies parallel or angular misalignment.
- Tension gauge: Verify deflection. Under-tension polishes sidewalls; over-tension overheats bearings.
If you uncover multiple issues—say, glaze plus edge wear—plan for a new belt and sheave inspection during your next ventilation efficiency service. That saves a second rooftop trip.
7-Step Professional Fan Belt Replacement Process
A reliable replacement follows seven steps: isolate power, inspect components, remove the worn belt, measure and match a new belt, align pulleys, set tension with a gauge, and verify performance. Document results and recheck tension after the first week of operation.
- Isolate and verify power off: Lockout-tagout at the disconnect. Confirm zero energy at the contactor.
- Inspect before removal: Note belt wear pattern, pulley condition, guard integrity, and motor mounts.
- Remove the belt safely: Loosen motor slide bolts; relieve tension; slip belt off without prying against sheaves.
- Measure and match: Record profile and effective length from the belt code; cross-check manufacturer charts.
- Align pulleys: Use a straightedge across faces; correct angular and parallel misalignment.
- Set tension: Use a belt tension gauge; a common target is about 1/64 of span length under specified force.
- Verify performance: Run the fan; listen for noise; record motor amps and airflow observations; reinstall guards.
Our technicians also note bearing temperature and vibration after the run test. A quick recheck 24–72 hours later catches run-in stretch so the belt holds its setpoint through busy dinner service.

Maintenance Schedule and Manager’s Checklist
Inspect belts monthly, verify tension quarterly, and replace every 6–12 months depending on volume. Bundle re-tension with hood and duct cleaning nights. Keep a labeled spare belt onsite and log readings for inspections and insurance.
Use this operations-friendly cadence across Ontario kitchens to avoid surprises during peak periods. It’s easy to adopt and works with existing night cleaning windows.
- Weekly (2–5 minutes): Listen for squeal, sniff for rubber odor, and do a quick hood napkin pull test.
- Monthly (10–15 minutes): Visual check for dust, fray, and glazing; confirm guard condition; note anything odd in the log.
- Quarterly (30–45 minutes): Full tension and alignment check; amp reading before/after; schedule re-tension after run-in.
- Seasonal (spring/fall): Re-verify tension after the first heatwave and first deep freeze; temperature swings change belt behavior.
- Annual: Replace belts or sooner if wear is present; inspect sheaves and bearings; refresh spare belts.
For a deeper preventive plan, see our commercial kitchen PM guide designed for restaurant managers and facility leads.
Integrating Belts with Hood, Duct, and Filter Service
Pair belt replacement with hood, duct, exhaust fan, and filter service to optimize the entire path in one visit. Clean systems reduce grease aerosols that glaze belts, and coordinated access minimizes downtime and repeat rooftop trips.
Here’s the thing: belts don’t fail in isolation. Grease-laden air, worn hinges, and clogged filters push the drive harder. Coordinating service creates a stable baseline you can maintain throughout the year without firefighting emergencies.
- Hood and duct cleaning: Lowers grease load so belts run cooler and fans maintain set speed longer.
- Filter cleaning & exchange: New or cleaned filters reduce static pressure spikes that cause slip. See our filter replacement guide.
- Exhaust fan cleaning: Balanced, clean wheels draw fewer amps and reduce belt heat.
- Hinged fan bases: Hinges protect wiring and belts during service; add weatherproof guards to keep drives dry.
When we schedule a belt job, we usually align it with a full ventilation optimization visit so everything from capture velocity to discharge looks right in one night.
Need a fast belt check before the weekend rush? Ask us to combine a quick drive inspection with your next hood cleaning night so you’re covered without extra downtime.
Many teams pair this with our ventilation efficiency checklist to document airflow health.
Best Practices to Extend Belt Life and Airflow Stability
Keep guards installed, pulleys clean, and tension checked quarterly. Replace sheaves showing groove wear, and re-tension new belts within 72 hours. Pair belt service with hood and duct cleaning to reduce grease aerosols that accelerate belt glazing.
- Quarterly checks: Confirm tension and alignment; look for fray, glazing, and rubber dust.
- Guarding: Always reinstall belt guards and rooftop hinges; exposed drives are a safety hazard.
- Clean environment: Grease mist hardens on belts; regular hood, duct, and fan cleaning slows wear.
- Sheave care: Replace cupped or sharp-edged grooves; worn sheaves destroy new belts fast.
- Motor mounts: Tighten slide rails evenly; cocked motors cause edge wear and noise.
- Spare belts: Keep a labeled, bagged spare onsite near the disconnect for emergencies.
Want a deeper dive into drive reliability? Explore our fan belt maintenance article with alignment visuals and simple field tests you can apply between service visits.
Tools, Safety, and Helpful Resources
Professional techs use lockout-tagout gear, belt tension gauges, straightedges or lasers, and torque tools. Pair these with inspection logs and documented maintenance to support insurance and fire inspection requirements in commercial kitchens.
- Safety first: Lockout-tagout, cut-resistant gloves, eye protection, and rooftop fall protection.
- Measurement tools: Belt tension gauge, straightedge or laser, calipers for groove checks, amp clamp.
- Documentation: Record belt code, date, amperage, and re-tension appointment on a visible service tag.
- Pairing services: Schedule belts during hood and duct cleaning so the whole exhaust path is optimized the same night.
For step-by-step visuals and deeper context, see these guides on belt reliability and safe coordination during service windows: keep exhaust safe, keep airflow reliable, and prevent kitchen fires.
Case Studies: Ontario Kitchens We’ve Helped
We reduce downtime by replacing belts proactively during scheduled cleanings. In high-volume Ontario kitchens, that means coordinating with overnight hood and duct work so the fan is back online before the morning prep shift.
- Quick-service grill line: Belt glaze produced a 6-second spin-down and audible squeal on start. Alignment and re-belt cut motor draw and restored stable capture through the lunch rush.
- Food court tenant: Frequent short cycles stretched belts quickly. Switching to cogged V-belts and a 30-day recheck stabilized airflow between cleanings.
- Institutional kitchen: Rooftop access in winter caused skipped re-tensions. We added a hinged base, weather-proofed guards, and a seasonal PM that eliminated emergency calls.
- High-volume fryer station: Grease mist accelerated glazing. Bundling belts with hood and duct cleaning reduced belt temperature and improved capture at the fryers.
- Bistro with evening peaks: Belt slip showed up only at dinner. A tension reset and filter exchange stopped the squeal and improved make-up air balance.
- Campus cafeteria: Multiple fans created staggered failures. A unified PM schedule and labeled spares cut response time and kept service lines moving.
- Bakery kitchen: Fine flour dust collected in guards. We added guard cleaning to the monthly list and extended belt life noticeably.
- Rooftop with no hinges: Damaged wiring during service was common. Installing hinges and drip rails protected the drive and wiring harness.
- Catering commissary: Start-stop duty overheated bearings. Alignment and amp trending caught the issue before a weekend outage.
- Late-night diner: Belts loosened during cold snaps. Seasonal rechecks and a bagged spare reduced after-hours calls.
- Ethnic quick-serve grill: Heavy smoke load required shorter intervals. Monthly inspections found wear early and prevented Saturday failures.
These patterns are common across Southern Ontario. The winning move is proactive checks timed to your real cooking volume and seasons—not a fixed calendar alone.
Pricing Factors and Scheduling Considerations
Investment for professional fan belt service depends on access, belt type, alignment or sheave repairs, and whether work is bundled with hood and duct cleaning. Plan service overnight or between shifts to avoid disruptions and take advantage of a single, coordinated visit.
There’s no one-size-fits-all plan. Kitchens vary in rooftop access, hinge conditions, and drive configurations. The smartest approach is to schedule belts during your regular hood and duct cleaning, then book a quick re-tension 24–72 hours later. That keeps your capture rate up without extra visits.
- Site factors: Rooftop height, hinged vs. non-hinged fans, and guard condition affect time on task.
- Scope: Single vs. multi-fan sites; alignment work; bearing checks; sheave replacement.
- Bundling: Combining with scheduled hood and duct cleaning minimizes downtime and repeat access.
- Timing: Overnight windows reduce impact on service and prep hours.
Frequently Asked Questions
Most kitchens should inspect belts monthly and replace every 6–12 months or at the first sign of glazing, fraying, cracking, or squeal. Use a tension gauge, not just the twist test, and recheck tension within 24–72 hours after installation.
How often should a commercial exhaust fan belt be replaced?
Inspect monthly. In moderate-use kitchens, many belts last 6–12 months. High-volume or start-stop duty shortens intervals. Replace immediately if you see glazing, cracking, fray, or hear squeal, or if tension can’t be maintained after rechecks.
What are the signs a fan belt is failing?
Common signs include black rubber dust near the guard, polished sidewalls (glazing), edge fray, a burning smell, squeal on startup, and reduced capture at the hood. You may also see uneven wear that points to pulley misalignment or worn sheaves.
Do I need a belt tension gauge or is the twist test enough?
Use both. The 90-degree twist is a quick field check, but a tension gauge confirms force and deflection against the span length. This prevents over-tension that overheats bearings or under-tension that causes slip and glazing.
Should belts be replaced during hood and duct cleaning?
Yes. Coordinating belts with hood, duct, and fan cleaning keeps the entire exhaust path optimized in one visit. It reduces repeat access, protects airflow, and simplifies documentation for inspections and insurance.
What causes belts to glaze or squeal?
Under-tension, misalignment, contaminated sheaves, and high static pressure from clogged filters all contribute. Fix the root cause—tension, alignment, cleaning—then install a fresh belt. Recheck tension after the first week to prevent a repeat.
Key Takeaways
Proactive, professionally tensioned and aligned belts keep exhaust fans moving air, reduce fire risk, and prevent costly downtime. Pair belt work with hood and duct cleaning, document readings, and schedule seasonal rechecks for stable performance year-round.
- Replace belts proactively and recheck tension within 72 hours.
- Correct alignment and healthy sheaves are as important as the new belt.
- Bundle with cleaning to minimize disruption and improve capture.
- Keep a labeled spare onsite near the disconnect for emergencies.
Conclusion
Commercial exhaust fan belt replacement is a small task with outsized impact. When belts are sized, aligned, and tensioned correctly, kitchens stay cooler, ducts stay cleaner, and service runs without surprises. Schedule a proactive plan to keep airflow steady through every rush.
Robinhood Cleaners supports restaurants, food courts, quick-service, and institutional kitchens across Ontario with NFPA 96–aware maintenance. We pair fan belt replacement with hood, duct, and exhaust fan cleaning, backed by WSIB-insured crews and 24/7 availability.